Hi all.
Phew
Did I just have a week! I had the opportunity to cater for a group of 13 people, every day for five days. I did one meal a day, but let me tell you, that means you work all day for that one meal if it's a dinner, or all day the day before if it's a breakfast. I took a leap of faith in saying yes, and I'm glad I did because I learned that I can, in fact, do something like this. Don't get me wrong, I don't want to jump on the crazy train and do it all again next week or anything (I might go so insane with cooking schedules, special dietary needs, grocery list making, grocery shopping, meal planning, prep, figuring out how to keep food warm/cold, planning what I can make in advance and what needs to be made on site, deciding which dishes to display food on and packing them up to take, packing knives, cutting boards, skillets, coffee makers, mason jars full of ingredients, sauces, herbs, garnishes, lemons, salt and pepper, platters, menus, remembering to print off and pack recipes for cooking time references, making sure things don't burn, making sure I don't undercook things, keeping cooked spinach green -uh, harder than it sounds- scheduling what time I need to leave my house to get everything ready on time, making food time lines, setting tables, clearing plates away, doing dishes, putting dishes away, wiping counters, washing my hands, fighting anxiety related to overcooking salmon and forgetting bread, and being on time with everything for every meal...so insane, I tell you, that I might rip out all of my hair and dance naked in the streets shouting "que cera cera!")
And, you all? I had to shower and sleep, too.
One day, I had to serve breakfast at 8am. EIGHT AM! I'm not complaining, I'm really not. It's just that I had to be up at 5:30am to pull it off. Even then, I was 7 minutes late and needed a two-hour nap. A nap mostly because I was up past 11:30pm prepping that breakfast since there was no other time to do it other than after I got done with a sit down dinner that happened the night before.
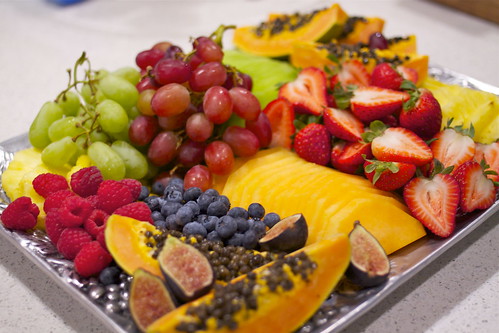
8am Breakfast Fruit Platter
In all seriousness, I was serving the most gracious of people and it was a pleasure being a part of their event. I'll probably wait a long while before doing anything like it again, though. I prefer actually looking at my kids rather than dough in the morning.
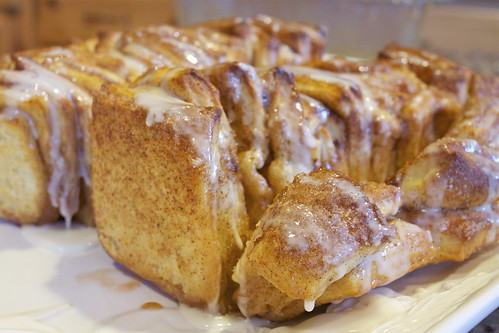
Oh! But this dough? It's the stuff exceptions are made out of. But, I'm confident I don't have to tell you that. The pictures are all you need. Okay, I'll elaborate. It's soft, pillowy sheets of warm dough (think the insides of a cinnamon roll) swaddled in cinnamon, sugar, butter, baked, pull-apart, glaze, dripping, love, unicorns, rainbows, puppies.
I'm sorry to do this to you because this recipe really is spectacular, and I know you really, really want to make it. I don't blame you. Heck, I can't stop making it. But, I also know you're freaked out about yeast and dough, and it's okay...we're going to get through this together.
Making cinnamon sugar pull-apart bread is simple, really (please resist the urge to slap me for saying that). A four step process, none of it complicated, just takes some time. But hard? Not at all. First, mix some flour, sugar, yeast and salt together and set aside. Next, heat some milk and butter together and add some vanilla extract for good measure. Then, there's nothing left but to combine the two.

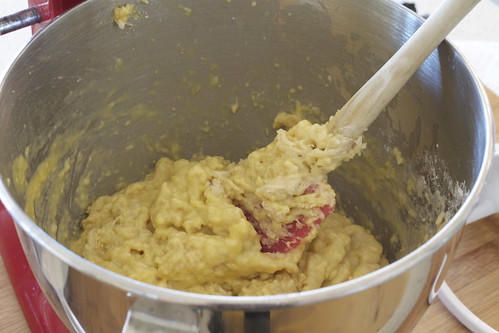
You with me? Add some eggs and more flour to the dough and mix
Place dough in an oiled bowl in a warm, NOT HOT oven and walk away. I usually preheat my oven to 350 for 1-2 minutes, then turn it off to warm it. That part is important because the little bit of heat helps to activate the yeast in the dough. After an hour, the dough will have doubled in size and look like this.

Next, you'll dump it out on a floured counter and knead a bit more flour into the dough so it doesn't stick to your hands. Don't freak at the mention of "kneading." Takes two seconds. The let your dough rest on the floured counter for five minutes while you get your filling ingredients ready (butter, and cinnamon sugar)
Roll out your dough into a large rectangle and brush with butter

Cover the surface with the cinnamon sugar

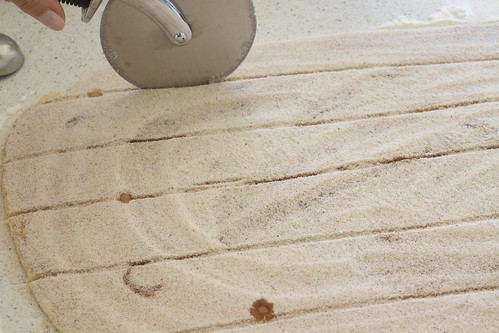
Cut into six strips. Don't let water drip on your dough like I did.
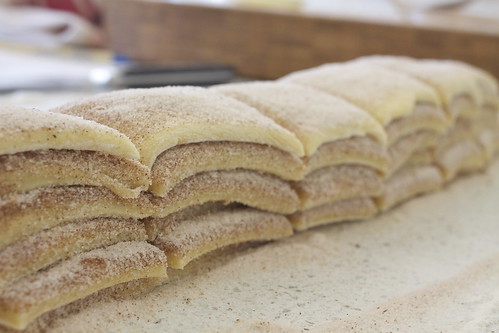
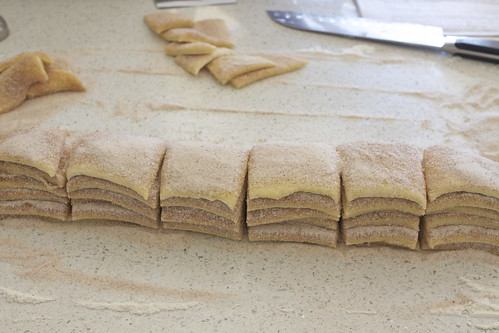
Next, you'll stack the strips and cut squares. that's what makes this "pull-apart bread".
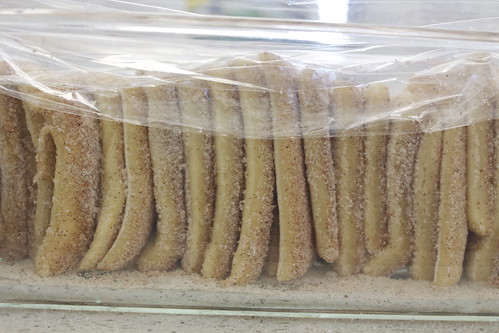
Line the strips up in a loaf pan, cramming rogue squares in pieces to fit
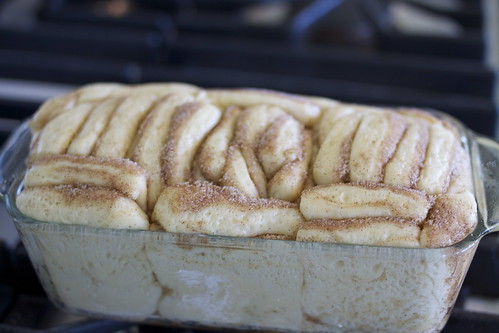
Let that rest in your warm oven, covered with a kitchen towel until doubled in size, about 30-45 minutes.
Bake.
Drizzle with glaze. Eat. Groan. Close your eyes.

Ain't no thing but a chicken wing.
So, I might have lied when telling you it was a four step process, but if I told you it was an eight step process, you might have stopped reading and you would have missed out because did you see how easy it was? Sometimes, we need white lies in our life in order to motivate. Don't repeat that.
Try and ignore the super long directions too. Long does not equal hard. I just really walked you through the process.
Cinnamon Sugar Pull-Apart Bread
adapted from Joy The Baker
makes one 9x5x3-inch loaf
For the dough:
3 cups all-purpose flour
1/4 cup granulated sugar
2 1/4 teaspoons (1 envelope) active dry yeast
1/2 teaspoon salt
2 ounces butter (1/2 a stick)
1/3 cup whole milk
1/4 cup water
2 large eggs, at room temperature (tip- to bring eggs to room temp fast, stick them in a bowl of warm water for a few minutes)
1 teaspoon pure vanilla extract
For the filling:
1 cup granulated sugar
2 teaspoons ground cinnamon
1/2 teaspoon fresh ground nutmeg
2 ounces unsalted butter, melted (1/2 stick)
For the glaze:
1 cup powdered sugar
2-4 tablespoons milk
1/2 teaspoon vanilla extract
In a large mixing bowl whisk together 2 cups of flour, sugar, yeast, and salt. Set aside.
Whisk together eggs and set aside.
In a small saucepan, melt together milk and butter until butter has just melted. Remove from the heat and add water and vanilla extract. Let mixture stand for two minutes, or until the mixture registers 115 to 125 degrees F. Don't freak out! If you don't have a thermometer or don't want to use one, just let it sit for two minutes before adding it to anything. It will be fine.
Pour the milk mixture into the dry ingredients and mix with a rubber spatula. Add the eggs and stir the mixture until the eggs are incorporated into the batter. the eggs will feel soupy and it'll seem like the dough and eggs are never going to come together. Keep stirring. Add the remaining 3/4 cup of flour and stir with the spatula for about 2 minutes. The mixture will be sticky. That's just right.
Preheat your oven to 350 degrees F for 1 minute. Then, turn it off. Now your oven is warm. That's perfect.
Place the dough in a large, greased bowl. Cover with plastic wrap and a clean kitchen towel. Check that your oven is not so hot that it will melt the plastic wrap, you want it pleasantly warm. Place covered dough bowl into your oven and shut the door, or leave it propped open if it's hotter than you think it should be, and allow it to rest until doubled in size, about 1 hour. *The dough can be risen until doubled in size, then refrigerated overnight for use in the morning. If you're using this method, just let the dough rest on the counter for 40 minutes before following the roll-out directions below.
While dough rises, whisk together the sugar, cinnamon and nutmeg for the filling. Set aside. Melt 2 ounce (1/2 stick) of butter. Set aside. Grease and flour a 9x5x3-inch loaf pan (that's an average size loaf pan). Set that aside too. Pat your self on the back. You've almost made it.
Sprinkle a handful of flour on your counter. Deflate the dough by handling it and knead about 2 tablespoons of the flour into the dough, just until you can handle it without it sticking to your fingers. Breathe, it will feel natural to do so. Cover dough with a clean kitchen towel and let it rest on the counter for five minutes. Dough is a lazy SOB and needs it's beauty sleep before it'll work for you. On your now lightly floured counter where the dough is resting, use a rolling pin to roll the dough out into a large rectangle. It should be around 12-inches by 20 inches, but it doesn't have to be exact. If you can't get the dough 20-inches long...that's okay. Just roll it as large as the dough will go, and be patient with it, it'll get longer with each roll. Use a pastry brush to spread melted butter across all of the dough. Sprinkle with all of the sugar and cinnamon mixture. It'll seem like a lot of sugar. Just use it.
Slice the dough vertically (long ways), into six equal-ish strips. Just eyeball it. Stack the strips on top of one another and slice the stack into six equal-ish slices once again. you should now have square sheets of dough. You might need to trim off a bit at the ends to make nice squares. That's okay, you can stuff those bits into the corners of the pan. Layer the dough squares in the loaf pan like a flip-book, then stuff sheets anywhere you can along the sides to fill that sucker up. It will rise and fill out, so allow a bit of wiggle room for that. Place a kitchen towel over the loaf pan and allow it to rest in your warm oven again for 30-45 minutes or until doubled in size. If you need to re-heat your oven again to get it to warm again, do so.
Take the loaf pan out of the oven, once it's risen and set on the counter. Pre-heat your oven to 350 degrees F. Place loaf in the oven and bake for 30-35 minutes. Check at 20 minutes and cover lightly with a sheet of aluminum foil if it's getting too brown. Bake until the top is a deep golden brown. When the top looks nice and lightly browned, the center may still be raw. A nice, dark, golden brown will ensure that the center is cooked as well.
Remove from the oven and allow to rest for 20 to 30 minutes. Whisk together ingredients for glaze. Run a butter knife around the edges of the pan to loosen the bread and invert onto a clean board. Place a cake stand or plate on top of the upside down loaf, and carefully invert so it's right side up. Drizzle glaze over top. Serve warm with coffee or tea.
I think this bread is best served the day it's made, but it can also be wrapped and kept at room temperature for up to two days.

 about cooking


That looks delish!!!
ReplyDeleteYum. Looks great! And go you for managing to cook for a group of people that large for five days. I don't know if I could do it. Although it does sound fun. :)
ReplyDeleteThis WAS delish! And, now I am encouraged to try this at home! Thanks for the step by step instructions and the reminder that "long does not equal hard!" BTW, your food last week was AMAZING,and I have the photos to prove it! Seriously, I took food pictures at EVERY meal! I loved reading the back story above about what it took to pull it off! I totally understand that passion comes at a price! I hope you share many sweet moments as you reunite with your family this week:) Thank you again for creating such delicious moments (and now memories)for GOLD 2012 and I love that I can stay connected with you on your blog!
ReplyDeletethis looks freaking Amazing!!!!
ReplyDeleteHi Kirstin! Thank you!
ReplyDeleteKrysta,
ReplyDeleteYou are a fabulous cook and food blogger! I can only imagine all of the preparation it took to get ready for GOLD 2012. I was there too-like Kirstin-and can attest to the fact that you pulled it off spectacularly. And honestly I couldn't help but admire how you never looked stressed! In my experiences growing up with my mom and grandmother in the kitchen, getting food ready for even a small group of 4 always included a lot more rushing, yelling, pulling hair out, etc. So while I'm sure that you felt plenty of that on the inside or beforehand, you could have fooled me! The moment you stepped in the door you presented everything with such a calm, gentle, and gracious presence. You have a gift! THANK YOU for making GOLD so special for us. Excited to keep reading!
Every meal was lovely! Thank you for sharing yourself and your talents with us last week at Gold. We were blessed, and oh-so satisfied. :)
ReplyDeleteYou guys are all too kind. Thank you for the encouragement.
ReplyDelete