Monday, June 28, 2010

Grilled Chicken/Shrimp and Peaches with Chipotle-Peach Dressing


The answer is yes. Yes, that funky picture of the chicken is in fact a picture of a picture in the magazine from which this recipe came from. That is why it looks cloudy and a bit unappetizing, but I needed to represent for all of you meat eaters out there! Otherwise, every single protein based picture on this blog would be fish and shellfish and you can't really run a legitimate food-lover blog on shrimp alone. Well, not if you are me anyway and happen to be a closet prosciutto eater...OK, moving on...

In a word, this meal was delicious. Period. Really, that's all you need to know.

Can't take my word for it eh? Alright, let me tell you all the wonderful foodie details!

Obviously I made this with shrimp (which was fabulous) but it was originally meant for chicken and you can use which ever you prefer or have on hand. I'm going to say that this is an all in all crowd pleaser because even though the whole peach and chicken pairing, (not to mention chipotle) probably really freaks out the picky eater demographic (I know you are out there) they will like this. All the flavors blend together so beautifully. The marinade/dressing is sweet and savory and tastes just as good on the grilled peaches as it does on the shrimp but not quite as good as if you get all of it in one bite. If you can do that (I had peach, shrimp and rice in every forkful) it's wonderful.

The marinade came together very quickly, say, 3 minutes and was totally simple. Basically you whisk together peach preserves, peach nectar, red wine vinegar, olive oil, chopped cilantro, salt and pepper and some juice from canned chipotle chilies in adobo sauce. The chipotle chile juice is adobo sauce and it is slightly spicy and very smoky. I advise putting the whole 2 teaspoons called for into the dressing because the end result is not very spicy. I stuck my finger in the sauce before I brushed in over my shrimp and thought it was a little spicy, which I like, so I wasn't alarmed. But when it's over everything and you are eating it, the flavors just works together and I promise it won't offend any ones palates. This dish is fit for company, yet casual enough to whip up for a late dinner on the deck on a warm night (guilty).

Grilled Chicken or Shrimp and Peaches with Chipotle-Peach Dressing
adapted from Bon Appetit Magazine

1/3 cup peach preserves
1/3 cup peach nectar
4 teaspoons red wine vinegar
2 teaspoons adobo sauce from canned chipotle chile's
2 teaspoons extra-virgin olive oil
1 teaspoon chopped fresh cilantro, plus more for garnish
3 large peaches, rinsed, fuzz wiped away, each cut into 6 wedges
4 boneless skinless chicken breasts (or 42 med-small shrimp, peeled and deviened-half a bag of frozen 31/40 lb shrimp)

Coat a grill rack with non stick spray. Prepare barbecue (medium-high heat). Stir preserves, next 3 ingredients, 2 teaspoons oil, and chopped cilantro in a medium bowl.

Brush peaches and chicken with the dressing, reserving at least half for drizzling over when done. Sprinkle chicken with salt and pepper. Grill until cooked through, about 7 minutes per side. Grill peaches until slightly charred, about 2 minutes per side.

Place 1 chicken breast on each of 4 plates. Surround with peaches. Drizzle dressing from the bowl over chicken and peaches. Garnish with cilantro sprigs.

*For shrimp: Thread 6 shrimp on each of 7 wooden skewers that has been soaked in water for at least 10 minutes (the wood will absorb the water so it won't catch on fire while grilling) If you have larger shrimp, use less. Spoon some of the marinade over, reserving some for drizzling after cooked. Grill for about 2 minutes a side or until just cooked through. Serve 12 shrimp per person, or 2 skewers. Surround with peaches and drizzle everything with the dressing/marinade.
Serves 4

Chipotle Chile's canned in adobo sauce are sold in the Latin foods section of most supermarkets. I, strangely enough found the peach nectar there as well, but I would think you should be able to get that in the juice aisle as well.

I served this with a whole grain rice blend but any rice would do nicely.

Sunday, June 27, 2010

Coconut Pink Cherry Frozen Yogurt


Have you ever tried making homemade ice cream? How about homemade frozen yogurt? Well, if you are anything like me, you have. Several times. And, if you are anything like me you have failed. Several times. If you haven't please spare me your success stories as I will be completely jealous seeing as how I have tried to make good, basic vanilla ice cream more than 5 times and each was more awful than the next (save for once in the girl scouts when I was about 13 and we made it old school in a coffee tin. I remember that being the BEST ice cream EVER! Very similar to Breyers, with no eggs. However, I was 13 and maybe I didn't know what good ice cream was back then, so who knows if I have ever conquered this.)

I was frustrated. Either the ice cream tasted like straight frozen cream, or the consistency was off, or it was yellow and thick from too many eggs. I threw away every batch. I tried it with more milk rather than cream but it just tasted like frozen milk. I just wanted some Breyers vanilla ice cream and I didn't think I was asking too much! I had some luck the last couple Summers with sorbet and so I was pleased with that, at least. Then, this Winter I made some caramel ice cream that was good, not perfect, but good and that appeased me for a while.

I just didn't understand why it was so hard. Why do ice cream/sorbet/frozen yogurt recipes vary so much? Why do some use all cream/all fruit while others water the whole thing down with water and milk? Eggs? No eggs? Further more, which way was better? And why when I have tried all the ways did nothing taste right???

Then, the Smitten Kitchen came across my radar. She blogged about this Coconut Pink Cherry Frozen Yogurt and she had me at the name alone. I mean how cute? Pink cherry. Adorable. After reading her post I knew I had to make it. She talked about all the same frustrations I had about frozen dessert and she too, searched for an answer. It came by way of David Lebovitz who is the author of "The Perfect Scoop" an ice cream cookbook. YES! She changed it up a bit, changing his plain frozen yogurt recipe to the cherry, coconut version here.

So I made it. And can I tell you? It tasted like actual frozen yogurt! Dang good frozen yogurt at that! It was like the kind you buy at the frozen yogurt houses! Do you get how excited I am about this??? You have to make this. It's the perfect Summer dessert and it's too easy. That was the best part! There was no cooking and cooling and long stints in the refrigerator before actually freezing it. It was just mixed up, chilled briefly and frozen. It was done and in my ice cream maker in 20 minutes from start to finish. Oh, how I love, love, love this!

There is one tiny thing though. This doesn't taste like coconut. It has coconut milk in it which lends a fabulous flavor as only it could give, but it's subtle. Necessary, but subtle. I love it, but I just wanted to make sure all you coconut enthusiasts (Danielle) knew this going in. It tastes like wonderful, fresh cherry frozen yogurt which is nothing to sneer at. If you added some bittersweet chocolate chips it would taste a lot like a frozen yogurt version of Ben and Jerry's flavor, Cherry Garcia. Ah, success. Maybe not at vanilla ice cream, but this is a fabulous start!

Coconut Pink Cherry Frozen Yogurt
adapted from Deb Perelman at Smitten Kitchen via "The Perfect Scoop"

Makes about 1 quart

3 cups Greek-style yogurt or strained yogurt*
3/4 cup sugar
1/2 teaspoon almond extract
1 cup cherries, pits removed and roughly chopped
1 cup unsweetened coconut milk

Place the yogurt, sugar, coconut milk and almond extract in a bowl and mix thoroughly. Place the yogurt mixture in the refrigerator to keep it cold while you pit the cherries.

I pitted my cherries by slicing the flesh off on all their sides like you would a mango, to avoid the pit, then roughly chop.

Take your yogurt bowl out of the refrigerator and stir in the cherries and freeze in an ice cream maker according to the manufacturers instructions.

*To make 1 cup of strained yogurt, line a mesh strainer with a few layers of cheese cloth, place it on a large bowl (to catch the liquid that will come out) then scrape 16 ounces, or 2 cups of plain whole-milk yogurt into the cheesecloth. Gather the ends and fold them over the yogurt, then refrigerate for at least 6 hours. Discard the liquid left in the bottom of the bowl and use the thickened yogurt.

I advise to not leave the almond extract out. It would still taste like frozen yogurt without it but the almond extract really helps to bump up the cherry flavor and carry it throughout since it is subtle.

The recipe does not specify what kind of yogurt you should use. I'm guessing whole milk Greek yogurt, but my store didn't have any, so I used half low-fat and half non-fat and mine turned out great but use which ever you would like.

Saturday, June 26, 2010

Spanakopita (Greek style spinach triangles)


I love spanakopita! With spinach and feta and phyllo, oh my! Ina Garten had the right idea when she took these traditionally small cocktail snacks and super sized them to make a main course for dinner. I didn't do this with the recipe because I'm bringing these to a brunch, but I mention it because it would be a fabulous idea! I will include instructions on how do either in the recipe section.
It was my friend Danielle's birthday this past Monday and so a couple of the girls are getting together for a brunch in her honor at her house. I don't know a lot of the people coming very well so thankfully there will be mimosas and really good food! If you don't know this about me already, I will just come out and admit that I can be a little socially awkward with people I'm not close with. Not all the time, but sometimes, and a good mimosa will go a long way to counter act it!
For the brunch I will be serving these adorable spanakopita triangles, fruit salad with honey dressing, a raspberry danish braid, blueberry crumb cakes and Angie will be bringing a bacon and goat cheese crust less quiche. Talk about a line up! Iced coffee and mimosas to round everything out and I'd say we have ourselves a par-tay! The menu is a little eclectic, I'll admit but Danielle likes it that way with samplings of different bites...and the day is all about her anyway.


Spanakopita
adapted from Barefoot Contessa Back to Basics

1/4 cup good olive oil
1 cup chopped yellow onion
2 (10-ounce) packages frozen chopped spinach, defrosted
5 large eggs, lightly beaten
3 tablespoons freshly grated Parmesan cheese
Plain dry bread crumbs
1 teaspoon grated nutmeg
2 teaspoons kosher salt
1 teaspoon freshly ground black pepper
2 cups small-diced feta cheese (12 ounces)
3 tablespoons toasted pine nuts ( I didn't use these)
24 sheets frozen phyllo dough, defrosted (note: you will need two packages)
1/4 pound (1 stick) unsalted butter, melted
flaked sea salt for sprinkling

Preheat the oven to 375 degrees

Heat the oil in a medium saute pan , add onion, and cook for 5 minutes over medium-low heat. Meanwhile, gently squeeze most of the water out of the spinach and place it in a large bowl.

When the onions are done, add them to the spinach. Mix in the eggs, Parmesan cheese, 3 tablespoons bread crumbs, the nutmeg, salt and pepper. Gently fold in the feta and pine nuts.

Place one sheet of phylllo dough flat on a work surface with the long end in front of you. Brush the dough lightly with butter and sprinkle it with a teaspoon of bread crumbs. working quickly, slide another sheet of phyllo dough on top of the first, brush it with butter, and sprinkle lightly with bread crumbs. (use just enough bread crumbs so the layers of phyllo don't stick together.) pile 4 layers total on top of each other this way, brushing each with butter and sprinkling with bread crumbs.

FOR DINNER SIZED SPANAKOPITA: cut the sheets of phyllo in half lengthwise. Place 1/3 cup spinach filling on the shorter end and roll the phyllo dough up diagonally as if folding a flag. Then fold the triangle of phillo over straight and then diagonally again. Continue folding first diagonally and then straight until you reach the end of the sheet.

FOR APPETIZER SIZED SPANAKOPITA: cut the sheets of phyllo into five, long ways so you have 5 long strips of dough. Place a teaspoon or so filling on the shorter end and roll the phyllo the same as directed above. 1 box of (18 sheets) of phyllo dough only makes about 20 appetizer triangles and leaves a lot of the filling left over. If you plan to only make this much, half the filling recipe above. Or use the left over filling in eggs, a quiche, a pizza pocket, etc.

The filling should be totally enclosed. Continue assembling phyllo layers and folding the filling until all of the filling is used. Place on a sheet pan, seam side down. Brush with melted butter, sprinkle with flaked sea salt and bake for 30 minutes for dinner size and 15 minutes for appetizer size or until the phyllo is browned and crisp. Serve hot.

Serves 12 dinner sized spanakopita or 20 appetizer spanakopita, if using half the filling recipe. 40 if you use all the filling and 2 packages of phyllo dough.

You can also refrigerate or freeze these, assembled and unbaked in a Ziploc freezer bag and just bake as directed when ready for them. They are so good! I hope you try them out. They are labor intensive but not hard to make at all. Persevere and be rewarded!

Thursday, June 24, 2010

Danish Raspberry Cheese Braid


I know. This is one of those things that you look at (especially if you have young children) and I know you think "Who does she think she is? People never make stuff like that! Who has the time anyway?" But, hark! Before you get all up in arms I have good news for you (further down) and an explanation for me. Me? Well, I have been participating in what I like to call "The Pastry Frenzy." I don't know why but I just got this wild hair last week and made apple strudel from my own phyllo dough, then there were the chocolate croissants from homemade danish dough and now this. I just got to thinking why doesn't anyone make their own pastries? Why does everyone buy store bought puff pastry and phyllo dough? Why do you hear people always cautioning you to never attempt to make your own dough unless you want to pull your hair out over frustration by the end of it all? I pondered such things. Then I decided I needed to know. I had to find out how hard it was. I had to feel the pain! Mostly, I needed to know whether homemade was worth putting in the effort or if store bought was just as good.

My findings so far are this: if you were ever thinking of trying to make your own phyllo dough for apple strudel, DON'T BOTHER! Just buy phyllo dough. It's not necessarily hard, per se, but tedious and extremely time consuming and unless you are a VERY patient person (and even if you are) you will inevitably rip the tissue thin dough while you are stretching it to a see-through almost unachievable state, thus resulting in thought of "this better be damn good!" only to realize upon the first bite that store bought is perhaps, gulp, better. NOOOOOOOO!

Danish dough, for things like chocolate croissants and this raspberry cheese braid is a whole other animal. It was great! Sure it takes something like 6-7 hours to complete, but it's not hard! Just time consuming. So I say, if you are feeling methodical and have the day to blow make homemade dough as it is better than store bought puff pastry. However, if that isn't even a remote option for you, you can still make this recipe using the store bought (the good news) and it's still really, really good and fast! See? Your "I would not, could not with a goat, I would not, could not on a boat, I would not could not....attitude about this braid just turned into "I could, I would with a goat, I could, I would on a boat, I could, I would wearing mittens, I could, I would make this in my kitchen!!!! I do like raspberry cheese braids Sam I am, I do like them, but not with green eggs and ham....eeer, or something like that.
Let me explain a couple things first. I find much more success in an otherwise complicated recipe if I fully understand exactly what is going to go down and why. Here are my pointers about this one. You are basically going to make a simple dough for your first step. It will take all of 5 minutes. You will then let it rest in the fridge for a half hour and you will be feeling victorious. In step 2 you will make a butter block. A butter block is cold butter (it has to be cold so don't try and bring it to room temp) that has been blended with flour. This is done easily in a stand mixer, but can also be done by beating the butter and flour together with a rolling pin until combined (Just mash over and over until there are no more lumps). It's cinchy (especially if you use the kitchen aid) and you will still be feeling victorious. The butter block will be folded into your dough several times later on to fully incorporate layers of butter throughout, thus making it a flaky light pastry. (you cannot achieve this by just blending it in, trust me. So don't try, this is an art people!) In step 3, you roll the dough out into a lightly floured surface (so it doesn't stick) into a rectangle about 18x13 inches and 1/4 inch thick...This is where people freak the heck out. Don't. It's just a measurement, so get your your trusty ruler out or if you are lucky like me you own a pastry mat that has measurement already on it. The measurement doesn't have to be exact, but make sure you're pretty close. Step 4: You situate the dough so that the short side is facing you (so you have a longer, narrower strip of dough going out like you are on an airport runway. Then you spread that butter and flour mixture you made over only the top and middle thirds, leaving a inch border around the dough so that when you fold it together the dough can stick to itself to seal shut rather than onto the butter to squish out. So now you should be left with 1/3 of the dough on the bottom of your runway closest to you, bare, no butter, non. Then you fold that naked 1/3 up over the butter like you are folding a business letter. Then you fold the top third over that (like you are folding a business letter). Now there should be no butter visible. This is called your "first turn" and you will have to do 4 of those before the dough is done, between refrigeration. In step 5, you will refrigerate the dough for another 30 minutes (this is to keep the butter cold) before you will roll it out again (situating it so that the folded side is to your right and the open sides is to your left) in an 18x13 inch rectangle and fold like a business letter. After doing this the third or fourth time, butter inevitably squirts out, but it's OK. Just flour over it so your rolling pin doesn't stick and keep going. In your step 6, you refrigerate the finished dough again for a longer period of time (at least 5 hours or overnight) perfect if you are having this for breakfast really, because you can do all of the prep the night before and finish it in the morning. Just make sure you get up early, because you still have to roll it out, fill it and let it rest for 2 hours at room temperature before baking. But, it's worth it. You'll see. But guess what? All you people who are going to skip the whole making your own dough thing and use puff pastry...all you have to do it thaw your dough, roll it thinner, fill it and bake it. No waiting, no proofing, just instant gratification! And, who couldn't appreciate that?

Something to note; This recipe for dough makes enough for 2 large braids. The filling recipe is enough for only for 1 braid. I like to freeze half of the dough and keep it for another time and make the braid with the remaining dough. I just cut the dough in half after it has refrigerated overnight and roll it out to an inch thickness (detailed instructions below) and freeze before rolling out my dough for the braid.

Danish Raspberry Cheese Braid
adapted from Sherry Yard's "The Secrets Of Baking" by way of Sass & Veracity

Danish Dough:
1 tablespoon active dry yeast
1/2 cup whole milk
1/3 cup sugar
1 1/2 teaspoons vanilla extract
1/2 vanilla bean, split and scraped (optional)
2 large eggs, chilled
1/4 cup fresh orange juice
3 1/4 cups all-purpose flour
1 teaspoon salt
Egg wash: 1 egg plus 1 egg yolk (to be used later)

Combine yeast and milk in the bowl of a mixer fitted with the paddle attachment and mix on low speed. Slowly add sugar, vanilla extract, vanilla seeds if using, eggs and orange juice. Mix well. Change to the dough hook and add the salt and flour, 1 cup at a time, increasing the speed to medium as the flour is incorporated. Knead the dough with the dough hook for about 5 minutes, or until smooth. You may need to add a little more flour if it is sticky. Transfer dough to a lightly floured baking sheet and cover with plastic wrap (I just skipped the baking sheet and wrapped it in plastic wrap). Refrigerate for 30 minutes.

Butter Block:
2 sticks cold unsalted butter
1/4 cup all-purpose flour

While your dough is resting in the refrigerator, make your butter block. Combine butter and flour in the bowl of a mixer fitted with the paddle attachment and beat on medium speed for 1 minute. Scrape down the sides of the bowl and the paddle and beat for 1 minute more, or until smooth and lump free. Set aside at room temperature until you are ready to use.


Directions:
After your dough has chilled for 30 minutes, turn it out onto a lightly floured counter top and roll it out into an 18x13 inch rectangle. (Just lean all your weight onto the rolling pin if it seems like it is hard to roll. However, if the dough ever shrinks back after you roll it at any time, let it rest for a couple minutes and then try rolling again). position the dough so that one of the short ends is facing you. Cover the upper two thirds of the dough evenly with the butter leaving a 1-inch border of the dough along the sides and at the top. Fold the bottom third of the dough, without the butter, on up over the middle third of the dough with butter.Fold the top third of the dough, with the butter, down over the middle third like you are folding a business letter. Press the edges of the dough together on all 3 sides to seal in the butter. Wrap with plastic wrap and place in the refrigerator for 30 minutes. your first turn is now done. After the 30 minutes, position the dough onto the floured work surface and position it so that the folded side of the dough is to the left and one of the short ends is facing you. Roll into a 18x13 inch rectangle and fold the bottom third up and the top third down, as if folding a business letter. wrap in plastic and put into the refrigerator to rest for 30 minutes. The second turn is now complete. After 3o minutes, take the dough out and rotate it so that the folded edge is on the right and roll again into an 18x13 inch rectangle. Fold again like a business letter, wrap in plastic wrap and refrigerate for another 30 minutes. The third turn is now complete. After the 30 minutes give the dough it's final turn, making sure that the folded edge is on the right before rolling. Wrap the dough in plastic wrap and refrigerate for 5 hours or overnight. At this point, if desired, the dough can be frozen for up to 1 month for future use. To do this, roll the dough out to about 1 inch thickness, wrap tightly in plastic wrap and then foil and freeze. Defrost the dough slowly in the refrigerator for easiest handling. Danish dough will keep in the freezer for up to 1 month.

Filling:
8 ounces cream cheese, at room temperature
1/3 cup sugar
2 large egg yolks, at room temperature
1 teaspoon vanilla extract
1/4 teaspoon kosher salt
raspberry preserves

Before you are about to roll out and fill your dough to bake, place the cream cheese and sugar in the bowl of an electric mixer fitted with the paddle attachment and cream together on low speed until smooth. With the mixer still on low, add the egg yolks, vanilla and salt until just combined. Don't whip. Set aside until ready to use. Later, you will spread some raspberry preserves over the cream cheese filling. How much you use is up to you. I used about 1/3 cup for the whole thing.


Assembly:

When the dough has been chilled for 5 hours or overnight, cut into half as you will only be needing half of the dough to make 1 braid. save the other half to make another braid (or freeze for later use per the instruction above). Roll out the dough on a floured surface into a 15x20 inch rectangle (mine was a little smaller, but not by much, maybe 14x18?) if the dough seems elastic and shrinks back when rolled, let it rest for a few minutes, then roll again. Place the dough on a baking sheet that has been covered with parchment paper or a silpat. VERY IMPORTANT! Place the dough on a baking sheet! (I totally skipped this step and assembled the braid on my counter and had a heck of a time transferring it to my baking sheet)

Along one long side of the pastry make parallel, 5 inch long cuts with a knife or rolling pastry wheel, each about 1 inch apart. repeat on the opposite side, making sure to line up the cuts with those you've already made.

Spoon the cream cheese filling down the center of the braid, making sure to not spread it right up to the edges of the cuts or it will leak out during baking. Keep about 1/4 distance from your filling and where the cuts start. Spoon the jam over the filling (use lemon curd, alternately if you like lemon better). Starting with the top and bottom "flaps", fold the top flap down over the filling to cover. Next, fold the bottom "flap" up to cover filling. Now begin folding the cut side strips of dough over the filling, alternating first left, then right, left, right, until finished. Trim any excess dough and tuck in the ends.

Cover the braid with plastic wrap that has been sprayed with Pam or oil so it doesn't stick and leave out at room temperature for 2 hours until it's almost doubled in volume. (I cheat a little, which I encourage, and warm up my oven to the lowest temp possible, then let it cool off a bit so it's around 100 degrees in there. Then, I place the braid in the oven and the heat helps the rising process along.)
After the 2 hours is up, heat your oven up to 400 degrees. Beat 1 egg and an egg yolk together (to create an egg wash) and brush it over your braid. When the oven has reached 400 degrees, put the braid in and bake for 10 minutes. Then, rotate the braid so that the side previously in the back of the oven is now in front. Lower the oven temperature to 350 degrees and bake for another 15 minutes more, or until golden brown. Cool and serve the braid either still warm from the oven or at room temperature. The cooled braid can be wrapped airtight and stored in the refrigerator for up to 2 days, or freeze for 1 month.
Glaze:
1 cup powdered sugar
2-3 tablespoons milk
Stir and drizzle over the cooled braid. Use more milk for a thinner glaze, less for a firmer glaze.
You. Are. Done.Pheww!
For all the rest of you who are going to cheat and use frozen puff pastry, just make the filling as directed and thaw the pastry per the package directions. Roll the dough out with a rolling pin to roughly 1/8 inch thickness. Make cuts as directed for the danish dough above, fill with you filling of choice per instructions above, braid, brush with egg and bake at 375 for 30-35 minutes until golden brown. Glaze. Enjoy.
Other filling options are to substitute lemon curd for the raspberry filling. Sauteed apple filling or chocolate or nutella and raspberries. The list goes on, really and that is what google is for. Some people just put fresh fruit like strawberries inside. For me though, it's got to be the cream cheese and raspberry filling because it tastes exactly like a fresh Entemans Raspberry Danish, like they sell in grocery stores, except, like, a million times better. I used to love those Entemans Danishes! But, I'm never going back.

Wednesday, June 23, 2010

Root Beer Float Pops- Isabella's Summer Snack


This summer I've decided to make a snack/treat with Isabella at least once a week to encourage her "like" of cooking and to spend quality, organized time together. I'm going to be blogging about these regularly for the next couple months, so if you have kids or a niece/nephew, etc. "Isabella's Summer Snack Corner" is going to have fun recipes and inspiration to spend some time together in the kitchen. Honestly, between you and me, you don't need a child present to want to make these snacks. Shhh, I won't tell.

I'm sure there are healthier treats out there, but these root beer float pops are so fun and cute, I couldn't resist! the kids are super excited about them because there is soda in the recipe (which we NEVER drink) and because it's a dessert that is easy for them to make. Jeremiah could practically do this on his own. In fact, these would make a great kids dessert for the 4th of July, which is coming up pretty quickly here.

You basically pour root beer in a popsicle mold about 1/3 of the way up. Then you pop a maraschino cherry into each one (too cute, right?) and then you freeze until solid or mostly solid. Then you fill the middle layer with vanilla ice cream and top off with root beer again and freeze until solid. These things taste just like root beer floats, it's a great way to beat the heat!

Root Beer Float Pops
adapted from delicious inspiration

12oz. root beer
6 maraschino cherries
1 1/4 cup vanilla ice cream, softened (leave it out on the counter for 7 minutes)

Pour root beer into popsicle molds about 1/3 of the way up and drop in a cherry. Freeze for 40 minutes or until solid. Divide ice cream between molds, sealing to the edges if possible. Pour the rest of the root beer over the top to fill and place sticks into the molds. Freeze until solid, about 2 hours.

Makes 6 pops


Wednesday, June 16, 2010

Zucchini, Basil, Tomato Saute


This is a side dish that they serve at a restaurant here in Steamboat called "Three Peaks Grill". No, it's not actually their recipe but the owner did tell me what went into it and I couldn't be more thrilled. I have actually made a mock version of this before using all the same stuff as it's not hard to tell what the ingredients are. It's very straight forward, but also, for some reason extra yummy. Maybe its the way you cut the zucchini into pretty little strips, or the way that all the ingredients come together and just mesh. What ever the reason, it's fresh, pure and simple with pops of fresh basil and tangy fresh lemon. It really tastes like Summer on a plate.

I made this a couple days ago on Thursday for our family dinner. My Aunt was in town and we had a little get together. This side dish went really well with our grilled salmon but I really like it with seared tuna, normally. I only recommend you make this when zucchini and tomatoes are in peak season. There's nothing worse to me than a mealy tomato. Ugh, the mere thought of it makes me shudder.


Zucchini, Basil, Tomato Saute
adapted from "Three Peaks Grill"

Olive Oil
4 medium zucchini, cut into a large julianne
2 medium tomatoes, cut into medium dice
15 leaves fresh basil, cut into a chiffonade
juice from 1 lemon
kosher salt
pepper
Serves 6-8

For the zucchini; cut each zucchini into quarter inch rounds, then cut those rounds 3 or 4 times across so you end up with small strips of zucchini.

Heat a saute pan over medium heat and add a couple tablespoons of olive oil. Add the zucchini and stir occasionally until it is starting to wilt then add the tomato chunks and saute everything together until almost cooked through. Add the lemon juice, salt and pepper to taste (you need quite a lot to bring the flavors out) and cook for another minute. Finally, take the vegetables off the heat and add the basil. Stir to combine and serve immediately.

I know it's kind of cheating when I blog about something like this. I find that sometimes I get really wrapped up in more complicated dishes that I forget about the less complicated and let's face it, simpler is sometimes better.


Friday, June 11, 2010

Copycat Little Debbie Oatmeal Cream Pies


I love recreating retro dessert snacks. I'm not sure why since I didn't eat a whole lot of them growing up, just on occasion, but they are nostalgic none the less. I hate heavily processed foods and was quite annoyed the last time I had one of these type of desserts. I don't remember when it was or even what it was (maybe a HoHo?) but I do remember it not tasting even remotely as good had when I was a child. In fact, it was kind of nasty and very fake tasting. A big disappointment for sure. Anyway, a few years back I read an article about a woman who owned a bakery and a popular item on the menu were her homemade knockoff hostess cupcakes, cute loops and all. It was then I had a eureka moment. I realized, hey, you can actually make this stuff and it would taste a thousand times better than out of a 2 year old box they sell at the grocery store! It was a big day for me. I remember thinking that If I ever had a bakery, I too, would make the hostess cupcakes (and guess what? I do make them for Sugar Me Sweet! awww) because that idea is just too charming too pass up. I have this little vision of a dessert bar at a wedding made up entirely of homemade versions of these types of desserts. Twinkies, HoHo's, Hostess Cupcakes, oatmeal cream pies, glazed hand pies, and snowballs...how cute would that be? Not to mention delicious!

I went on a retro baking frenzy yesterday and made most of what I just wrote in the last paragraph. Everything turned out excellent, much to my delight. I decided I'd share the oatmeal cream pies with you (even though I have certain friends, cough, Melissa and Shawn, that flipped for the Twinkies) because they were always my favorite growing up, and I've never made a soft cookie that actually stayed soft before these, and I think that is very interesting. Not to mention that they are sooooo good. The soft oatmeal-y cookie sandwiched between fluffy vanilla cream, I mean, how could it not be? And as a bonus, they are so simple. You could make them in 35 or so minutes from start to finish.


Copycat Little Debbie Oatmeal Cream Pies
adapted from CDKitchen


Cookies
2 sticks margarine
3/4 cup dark brown sugar ( I used golden)
1/2 cup sugar
1 tablespoon molasses (or honey or pure maple syrup)
1 teaspoon vanilla
2 eggs
1 1/2 cup all purpose flour
1/2 teaspoon salt
1/8 teaspoon cinnamon
1 teaspoon baking soda
1 1/2 cup quick cooking Quaker oats


Cream Filling
4 teaspoons very hot water
1/2 teaspoon salt
2 jars (7oz) marshmallow creme, or fluff
1 cup shortening
2/3 cup powdered sugar
1 teaspoon vanilla extract

Preheat oven to 350 degrees

In a large bowl or an electric mixer, cream together margarine, sugars, molasses, vanilla and eggs. In a separate bowl combine the flour, salt, baking soda and cinnamon. Combine the dry ingredients with the wet. Mix in the oats.

Drop by tablespoonfuls (mine were slightly bigger dollops) onto an ungreased baking sheet. Bake for 10-12 minutes, or until cookies are just starting to darken around the edges. They will still appear moist in the center. Be careful not to overcook! When cooled, the cookies should be soft and chewy.

While the cookies bake, prepare the filling. Use a small bowl to dissolve the salt in 2 teaspoons of very hot tap water.Set the solution aside to cool.

Combine marshmallow creme, shortening, powdered sugar, and vanilla in a medium bowl and mix well with an electric mixer on high speed until fluffy. Add the cooled salt solution to the filling and combine with the mixer.

Assemble each cream pie by spreading the filling generously over one side of a cookie (the flat side) and press another cookie on top, making a sandwich. Repeat for the remaining cookies and filling.

Makes about 10-12 oatmeal cream pies (2 cookies to a pie)

The cookie batter does expand quite a bit in the oven, FYI. I removed the cookies from the pan when they were still warm and transferred them to a rack to cool completely flat side up. I found that you should you a thin, metal spatula to remove the cookies from the baking sheet as they are quite flexible and might break or bend if you try to scrape them off with a thicker plastic one, but even a knife might work if you are going to wing it. I like to put a generous amount of cream filling inbetween the pies. Otherwise they are too thin. This, by the way, is generally the same cream filling that gets injected into Twinkies and Hostess cupcakes. Enjoy!


Tuesday, June 8, 2010

Grandpas Favorite Chocolate Cheesecake


This is serious adult cheesecake meant for mature palates. It's not sweet. It's got a deep complex and rich bittersweet chocolate flavor and is tangy and sour (like cheesecake is supposed to be) with a welcoming sweet cocoa crust. It's the James Bond of cheesecakes. It doesn't mess around and it just so happens to be my Grandpa Grillo's favorite. The story goes like this; One day my Grandma went over to help a neighbor out who's husband was sick. As a thank you the woman brought my Grandma this chocolate cheesecake and they both flipped over it and asked for the recipe.

I am right at the tail end of making up my menu selections for Sugar Me Sweet (my new cake and pie business...sugarmesweetcakes.com) but I still had to make this cheesecake to make sure the recipe still worked since it's been a couple years since the last time I made it. My Grandma is out of town visiting Napa Valley, CA with a friend of hers so I thought it was the perfect time to invite my Grandpa, over and to make his favorite cheesecake for dessert. He came and ended up bringing us some very nice wine and we spent a great evening out on the deck eating and talking. A win, win situation. The highlight of the night, of course was the cheesecake in all it's chocolate glory. How could it not be? Homemade cheesecake is no small feat, especially one with NO cracks, yes I said no cracks thankyouverymuch and I'll show you how to do it too. Cheesecake is very high maintenance as far a desserts go. It's not hard to make, but it gets finicky in the follow up. Turning the oven to high, turning it back down to low, cooking it for a long time, then turning the oven off, but leaving the cheesecake in there with the door ajar for exactly 30 minutes. Then theres the cooling. You leave it at room temp for a while. Then you have to refrigerate it overnight to get it to set up properly which means you have to plan in advance. Like I said...It's not hard, you just have to make sure you have most of the day at home to dedicate to it. Ohhh, but it's worth it and everybody likes cheesecake and chocolate don't they? I'm telling you even if they don't (I'm going to confess, that I don't really enjoy cheesecake too often) they will like this.

Grandpa's Favorite Chocolate Cheesecake
1 box chocolate teddy grahams (or chocolate wafers)
1 stick butter, melted
1/4 teaspoon cinnamon
8 oz semi sweet chocolate
3 8-oz packages cream cheese, at room temperature
1 cup sugar
2 cups sour cream
3 eggs, plus 1 egg yolk
2 teaspoons cocoa powder
1 teaspoon vanilla
1 cup sweetened whipped cream, for serving
preheat oven to 450
Process teddy grahams is food processor until finely ground (or crush manually) Add in the butter and cinnamon and mix well (if crumbs are not wet enough, add more butter. they should stick together when squeezed in your hand) Press crumbs into the bottom and slightly up the sides of a 9" springform pan. Chill in the refrigerator, don't bake. Melt chocolate in a double broiler or in a bowl in the microwave heated in 30 second intervals until melted. In the bowl of the electric mixer fitted with the paddle attachment, beat cream cheese until smooth. Beat in sugar and then add eggs and egg yolk one and a time beating well after each addition. Beat in melted chocolate, cocoa and vanilla blending thoroughly. Lastly, beat in the sour cream. Pour mixture into the crust (it will fill the pan) and place in the 450 degree oven. Bake for 15 minutes. Turn the oven temperature down to 225 degrees and bake for another 1 hour and 15 minutes. Turn the oven off and open the door wide. The cake will not be completely set in the center. Allow the cake to sit in the oven with the door open for 30 minutes. Take the cake out of the oven and allow it to sit at room temperature for another 2-3 hours, until completely cooled. Wrap and refrigerate overnight or for at least 6 hours. Remove the cake from the sprinform pan by carefully running a hot knife around the outside of the cake. Leave the cake on the bottom of the springform pan for serving.
Serve with whipped cream
Make sure to follow the cooking and cooling directions exactly for a crack free cheesecake!


Sunday, June 6, 2010

Eva Longoria Parker's Tortilla Soup

Tortilla Soup

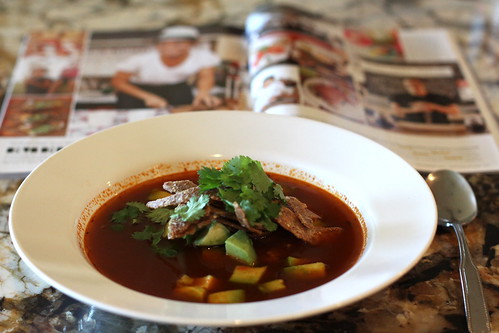
You probably are wondering why I'm writing about tortilla soup in the midst of our glorious heat wave (70's and 80's) In Steamboat. Well, sadly it's because my husband is sick (I was sick with the same thing last week) and I wanted to make him something to help him feel better. Well, that and it's Mexican. If the meal is Mexican, even when it's soup and warm outside, I feel like it's okay. Hot Mexican food is a free pass during the summer. This particular recipe comes from Eva Longoria Parker, also known as "Gaby Solis" on Desperate Housewives. I decided to make this for a number of reasons. It looked like an authentic tortilla soup recipe and Eva is Mexican, so we had that going for us. Then, there was the fact that she serves this at her (and Chef Todd English's) restaurant, Beso. And finally, Jeremy loves Mexican food and this recipe called for ancho chilies to be pureed and added to the soup and I knew it would help his stuffy nose.

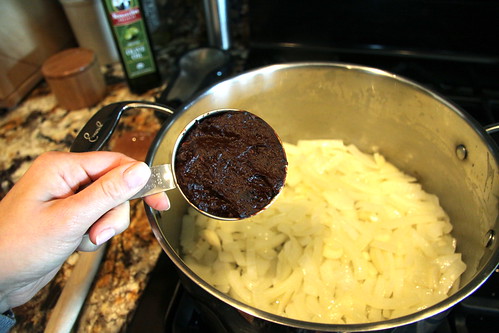
The chili paste
IMG_6652

I'm glad I decided to make it. It was very good. It's not a Longoria family recipe though. Eva modified the traditional dish on her own. She has said that she has adjusted the recipe over many, many years. It's light and easy (don't let the soaking the dried ancho peppers and puring them into a paste scare you. It's super quick) and you can make it more filling by adding grilled chicken. We had this for lunch, but it could just as easily be a light dinner, or a first course.

Tortilla Soup

I feel like I should tell you, in case you don't read the recipe all the way through, that this particular recipe calls for straining the soup at the end to get rid off all the solids, like herbs, onion and tomato chunks so all you are left with is a flavorful broth. I actually love this idea. It makes for pretty presentation because when you go to serve this, you first mound up your grilled sliced chicken and half an avocado, cut into chunks into the bottom of a shallow bowl. Then you add a bunch of fried tortilla strips and cilantro to top. Then you ladle in the hot tortilla soup broth so it encircles the whole thing. Top the everything off with queso fresco (white crumbly Mexican cheese, that they sell in grocery stores...sometimes called cojita cheese) and you're in business.


Tortilla Soup
adapted from Beso restaurant, Eva Longoria Parker

3 dried ancho chile peppers (with the bell peppers in Safeway, or in Mexican section)
1 tablespoon extra virgin olive oil
1 onion, sliced
3 garlic cloves, smashed
1 28-ounce can of whole plum tomatoes
1 tablespoon coriander seeds
1 teaspoon cumin
6-8 cups low sodium chicken broth (or vegetable broth)
2 bay leaves
4 springs fresh thyme
kosher salt
1 -2 grilled chicken breasts, sliced
3/4 to 1 cup crumbled queso fresco
2 avocados, diced
fresh cilantro
4 corn tortillas, cut into thin strips and fried
1 to 2 tablespoons sour cream (optional)


Bring a saucepan of water up to a boil and add the dried peppers in, turn off the heat and cover. Let them soak for 15 minutes, or until soft. Drain the chile's, and discard the stems and as many seeds as you can. Transfer to a blender and process to make a smooth puree (use some water if needed to loosen up the mixture to help make a paste).

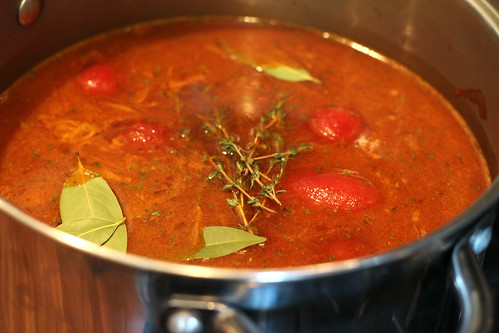
Heat the olive oil in a large pot over medium heat, then add the onion and garlic and cook until translucent. Add the tomatoes with their juice, 1/4 cup chili puree, the coriander seeds and cumin and cook about 5 minutes. Add the broth, bay leaves and thyme and bring to a boil, then reduce to a simmer and cook about 30 minutes (I smashed the tomatoes against the pot to break then up a little and let the juice out). Strain the broth through a medium-mesh strainer into another pot, discarding the solids. Season the broth with salt and heat up again ( I needed a lot of salt. If it tastes bland at all, add more salt and it won't. Salt brings out all the flavor).

Place a small amount of chicken, avocado, tortilla strips, cilantro and queso fresco in each bowl, then pour about 1 cup of the hot broth around the garnishes. Add sour cream if desired.
serves 4

I cut my tortillas into thin strips and fried them in a small skillet in olive oil over medium to med-high heat until crispy. As for the chicken, I didn't add any. But I'm sure marinated in a little lemon juice, thyme, olive oil and salt for about 20 minutes before grilling would be great. Either that or sprinkle it with blackening seasoning and grill for more flavor.

This soup is not spicy so don't be afraid to add the whole 1/4 cup of ancho chile paste. In fact I wish it was a smidge spicier, which is why the recipe calls for 6-8 cups of stock. The original recipe calls for 8 cups, which is what I used, but I think it would have even been better had I reduced the broth to 6 cups. It would have had a more concentrated flavor. But please, do what you like.