Thursday, July 28, 2011

Asian Tuna Sliders

Asian Tuna Slider

Suuuuriously friends, I beg of you to make these. My cousin Harrison was visiting last week with My Aunt Kellie. My Aunt Kellie and I talk food all the time and thank goodness Harrison chimed in when he did to tell me about these burgers. He said he used to eat them at Bleeker St, his dad's old restaurant, and they were one of the best things he has ever had. He proceed to call his dad up and ask about them. His dad, Steve, says not only does he know what he is talking about but they were his own recipe. Score! Steve is a fabulous chef who eats pretty cleanly. Lots of fish and salad, no mayonnaise, sort of stuff. This recipe is great in so many ways. First, it could be an appetizer, or dinner. We chose to eat sliders as the main course with some grilled zucchini on the side. Second, aside from the bun (but who's keeping track?) this is totally healthy. I was really surprised at the ingredient list because it seemed so simple and it lacked a binder like an egg or cheese that normal non-beef burgers have to make them stick together. It worked out like a charm and I am so thankful to have these babies in my repertoire.

IMG_5686

IMG_5691

Asian Tuna Sliders
adapted from Steve Hamile

Please note: this is a recipe per LB of Tuna (our 2 1/2 pounds made about 16 sliders and we changed the quantities of the ingredients accordingly)

For the burgers:

1 lb tuna steak cut into small cubes (1/4")
3 tablespoons seasoned rice wine vinegar
1 teaspoon soy sauce
1 tablespoon white miso paste
2 green onions, chopped
1/4 teaspoon wasabi powder
Kosher salt to taste
slider buns, toasted lightly on the grill
sesame oil, for pan frying

Blend all ingredients together. Heat sesame oil up in a skillet (enough to coat the bottom of the pan thinly) over medium heat and form tuna into small slider burger patties. The mixture will not really stick together well, but try to firmly pack patties into the palm of your hand and put directly into the hot oil, only making enough to fit into the bottom of the pan as you go. As it cooks, the burgers will keep their shape. If need be, you can add a bit of rice flour to the tuna mixture to help form patties so it stays together.

Cook until desired doneness. We cooked ours well done (about 1 1/2 minutes a side) but cook it slightly less for a pinker center (only recommended if you buy sushi grade tuna). Once the first round of sliders are done, transfer to a plate and cover to keep warm and cook the rest. When all the sliders are cooked, put the patties in the toasted slider buns, top with slaw (recipe below) and eat.

Purple Slaw:

1/2 a head of purple cabbage, sliced thinly into slaw
1/4 cup seasoned rice wine vinegar
1 teaspoon honey
1/2 teaspoon chile powder
3 tablespoons sesame seeds
1 tablespoon white miso paste

Combine all ingredients and let sit for 30 minutes at room temperature. The vinegar will wilt the cabbage a bit making it easier to eat.

Put finished slaw on top of tuna sliders.

It is much easier to cut the tuna steak into cubes if you stick it in the freezer for 45 minutes before cutting.


Monday, July 25, 2011

Raw Cashew Dreamcake

Raw Cashew &<span class=

Yes, it's vegan. It's also raw, and healthy. But you know what else this dessert is? Fast, easy and down right delicious! Turns out, when you soak raw cashews in water overnight, they get soft and turn to "cream" when pureed in the blender. Add some water, vanilla, coconut oil, honey (or agave) and lemons to achieve that "cheesecake" tang and you have a dreamy, creamy filling. Add fresh berries to that and you've got a dreamy, creamy, berry flavored filling. Add a crust of carmely dates and walnuts and hold on to your seats because it's going to be one one healthy, insanely good ride. You'll do the happy dance. If you have one, that is. I certainly do not. I prefer high pitched shrieking, myself.

Raw Cashew &<span class=

Cheesecake good for you? Well, not as an I'm going to eat this everyday for breakfast, lunch and dinner sort of way, but definitely in the replacing the heavy, sugar laden, animal fat, normal cheesecake you would usually consume sort of way. I'll let my friend over at My New Roots give you the breakdown. This is what she says: "Here's the deal: this cheesecake is raw, meaning that all the powerful vitamins, minerals, and enzymes present in the whole foods you use to make the cake remain intact. Instead of an atom bomb of empty calories in your belly, you actually have a handful of fruit, nuts, and raw honey swimming around, and your taste buds are none the wiser." Pretty neat, huh?

I'm headed out of town this week, so I have scheduled a post or two while I'm gone. I'll miss your blogs but catch up when I get back!

Well, what are you waiting for? Go buy yourself some raw nuts and get on it!

Raw Cashew Dreamcake
adapted from My New Roots

Crust:
1 cup raw almonds (pecan or walnuts will also work)
1 cup soft Medjool dates
1/2 tsp. sea salt

Filling:
3 cups raw cashews, soaked for at least 5 hours, overnight is best
juice of 2 lemons
seeds from 2-whole vanilla beans (or 2 tsp. alcohol-free vanilla extract)
2/3 cup raw coconut oil, melted
2/3 cup raw honey (solid or liquid) (Vegans, use agave nectar)
2 cups berries (strawberries, raspberries, blackberries or blueberries)

Place nuts and dates in a food processor with sea salt and chop until they are your desired fineness (longer for finer pieces, and shorter for chunkier pieces). Test the crust by spooning out a small amount of the mixture and pressing it together. If it sticks and holds together, your crust is perfect. Scoop put crust mixture into a 9" springform cheesecake pan. If you don't have a spring form pan, use a pie plate lined with saran wrap and press firmly making sure that the edges are well packed and the base is even throughout. Rinse food processor well.

Warm the coconut oil and honey on low heat in a saucepan until melted and whisk together.

In the most powerful blender or food processor you own (I used my Vita-Mix) place all filling ingredients, except berries, and blend on high until very smooth (this may take a couple minutes so be patient).

Pour about 2/3 of the filling into the spring form pan over the crust and smooth with a spatula. Just eyeball it. Add the berries to the remainder of the filling and blend on high until smooth. Pour out the berry filling on top of the plain filling and smooth with a spatula on top. Place in freezer until solid.

To serve: remove dreamcake from the freezer 30 minutes prior to eating. Run a smooth sharp knife under hot water water and cut into slices. Serve on it's own or with a garnish of fresh berries. Store leftovers in the freezer. A quick note: The cheesecake will freeze solid. To achieve that creamy texture, you have to let it thaw for 30 minutes before cutting.

Your cheesecake will be thicker than mine. I didn't quite have all the ingredients to make a full recipe.

Friday, July 22, 2011

Vietnamese-Style Rice Noodle Salad

Vietnamese-style rice noodle salad

Packed with bright lime and a touch of spicy heat, and just the right amount of crunch, this noodle salad is great for lunch or dinner. I love Vietnamese or Thai anything and I'm a sucker for fresh mint, so I knew upon seeing the recipe that it would be made in my kitchen within days. It was, and now I am officially in love.

I get skeptical when reading recipes for Thai cuisine because in America we seem to have trouble balancing that spicy/sweet/salty/sour thing that comes so easy for them. I read through recipes for things like Pad Thai, cellophane noodle salad, or hot and sour soup, and usually discard them after deciding it's going to be too bland, or just spicy, or just sweet instead of that perfect balance. This recipe hits it on the head. In short, it is awesome. It's soft, crunchy, fresh, flavorful and light and really versatile as you could add anything to it. It would be great with shrimp or chicken. My picture makes it look as though this is a lot of vegetables and not much noodle. In reality, it's about a 50/50 ratio.

Vietnamese-style rice noodle salad

I used to be scared of fish sauce and what I learned is...just don't be scared of fish sauce. You don't taste it, but it lends itself perfectly to the dressing.

I love that I found this right in the middle of summer. It's still raining most every afternoon but it has been hot (finally) and this salad is what I'm craving over and over again. You will too.

Vietnamese-Style Rice Noodle Salad
adapted from Fine Cooking, Aug/Sept 2011

Serves 6-8

1/2 cup fresh lime juice (about 2 large limes)
1/4 cup finely chopped cilantro
2 tablespoons fish sauce
2 tablespoons granulated sugar
1 tablespoon minced ginger
3 large garlic cloves, minced
1 Thai bird chile, seeded and minced
8 oz. dried rice noodles (about 1/4 inch thick) I used a smidge more
4 cups thinly sliced iceburg lettuce
1 large carrot, shaved into ribbons (use a vegetable peeler)
1 large cucumber, peeled if you like, cut into half moons
5 medium radishes, thinly sliced
1 cup fresh mint leaves
1/2 cup salted peanuts, coarsely chopped (optional)

In a small bowl, combine the lime juice, cilantro, fish sauce, sugar, ginger, garlic, and chile and let sit for at least 10 minutes.

Meanwhile, bring a large pot of well-salted water to a boil. Add the rice noodles and stir immediately. Cook the noodles, stirring frequently, until just tender, about 5 minutes. Drain and rinse the noodles with cold water until cool to the touch.

In a large salad bowl, combine the noodles with the lettuce, carrot, cucumber, radishes, and mint leaves. Toss the salad with the dressing and garnish with the peanuts.

My Aunt Kellie has been visiting and we always have so much fun when she is here. We also do a lot of cooking when were together so I'm excited to see what recipes will come out of this trip.

friday potluck guest host girlichef

Wednesday, July 20, 2011

Peach Jam

Peach Jam

Peach season is in full swing so you might see more recipes than normal using them. I adore peaches and can't wait to make jam each and every year. If you don't already know, peach jam on a piece of toasted buttery sourdough (or biscuits!) might be the best thing ever. I once worked a wedding where the bride gave mini jars of homemade Colorado peach jam as her wedding favors. Cute idea, right?

Jam is easy but canning is, I'll admit, a process. The up side is it's easy to do and well worth it since you can have fresh peach jam all year long! I'll break it down and make it easy for you. If canning is too much for you to handle, you can always make a half batch of jam, keep a jar or two for yourself and give the rest away as gifts. A jar of fresh jam will keep in the refrigerator for two weeks or so. Use it for toast, on top of vanilla ice cream or on a crusty baguette with melted Brie or goat cheese.

I do recommend you pick up a canning kit from Wal-Mart (you can find them other places too) because it will make your life easier and more importantly, you will need the little wire basket thingy they give you to put your jars into so they don't touch the bottom of your pot. Glass touching the bottom of my pot without water circulating underneath freaks me out. It would make a mess too, but I'm sure people do it. Google before you try it, okay?

Let me walk you through peach jam 101. First you will mash about a cup of pitted, skinless chopped peaches in the bottom of a pot. (A quick way to remove peach skins is to drop a few peaches at a time into a pot of boiling water and let "cook" for 1 minute. Then, with tongs, remove the peaches and place them in a bowl of ice water to cool. Make an "X" with a small knife in the bottom of the peach and peel. The skin should come off very easily but if you have trouble, drop it back in the boiling water for another minute and try again.)

Peach Jam

Then you add the remaining chopped peaches to the pot and cook over medium-low heat. It will come to a boil and you should simmer this whole mixture for about 30 minutes or until peaches become somewhat liquid. There will be peach chunks left but it will look something like the second picture.

Peach Jam

Peach Jam

Next, add the sugar, bring to another boil then add the pectin and continue to boil for 1 minute.

Peach Jam

After you add the sugar, it will get syrupy like this

Peach Jam

Remove the pot from the heat and transfer finished jam into sterilized jars. *This is where people freak the heck out.* Listen, I might get in trouble in the canning world for saying this, but instead of boiling my cans and lids to sanitize them, I simply wash them all in my dishwasher about an hour before I need them. That way the jars and clean and hot, which is exactly what you want for canning. Hot jam needs hot jars and lids. It's just the way it needs to be. I just make sure all the parts to the jar are dry before I begin. (If you have accidentally let your jam cool off before your jars were ready, no worries, just bring the jam to a simmer before transferring it to the jars. I cannot stress this enough- HOT JAM=HOT JARS.

Peach Jam

Peach Jam

I don't have a picture for the next step. I apologize. After you fill your jars and seal them, you place them into the wire basket six jars at a time, since that's all my pot holds, and place them into the pot that comes with your canning kit filled with boiling water. Once the jars are in, the water should be 2 inches higher than the top of the jars. If it's not, add more water and wait for it to boil. Once the jars are in the boiling water you let it hang out for 10 minutes. Then, using the rubber tongs that come with your canning kit, lift out the jars one at a time and place on a dish towel on your counter and let them come to room temperature. As the jam cools, you will hear the lids pop. That means it has sealed correctly. To test, press the middle of the lids with your finger. If it presses down at all, it did not seal properly. It won't be a total loss since you can still put it in your fridge. Once jars have cooled, you can store at room temperature in your pantry.

Peach Jam
adapted from allrecipes.com

makes 10 smaller sized jars worth

12-14 fresh peaches, pitted, peeled and chopped small
4 cups white sugar
1 (2-ounce) package dry pectin
Jars for canning (I use 1 cup jars)

Crush 1 cup chopped peaches in the bottom of a large saucepan with a potato masher. Add remaining peaches, and set pan over medium-low heat. Bring to a low boil, and cook for about 30 minutes or until peaches become liquid (my family like a few bits of peach left)

Pour peaches into a bowl, and then measure 6 cups back into the pan. It should be pretty close to six cups without a lot left over, if any. Add sugar, and bring to a boil over medium heat. Gradually stir in dry pectin, and boil for 1 minute.

Remove from heat after 1 minute, and transfer to hot, fresh from the dishwasher and dried completely (see note above in the text) jam jars. Process in boiling water, with the help of a canning kit for 10 minutes. Remove from water, place jars on a dish towel on the counter top and let cool until room temperature and place on shelves.

Happy canning! Be careful, you might catch the bug. I want to make a fresh strawberry-pineapple jam next!

Monday, July 18, 2011

Grilled Pizza Margherita

Grilled Pizza <span class=

I grilled pizza for the first time the other day and love it already! It was a bit intimidating at first because you need to have all your toppings ready and waiting since you top the pizza while it's on the actual grill. After you cook one side of the pizza for a minute, you flip it over and put all the toppings on, then close the lid until it's done. It was a little nerve-wracking because my grill is really hot. There is no cooler part in which to move the pizza while I put all the toppings on. I was in race with time to top it and let it cook before the underside burned. It worked out though. It's amazing how quickly it comes together.

Grilled Pizza <span class=
Feta cheese is pictured, but was only used for my husbands "special" pizza

What I love, love, love about the grilled pizza is the dough puffs and creates pockets like you get with a wood fired pizza. That kind of magic doesn't happen in my oven.

I have made a few pizzas in my day and I have learned some things along the way. One being, the sauce is always simple. Some recipes call for whole tomatoes that you crush with a little salt and pepper, which I found to be a bit watery. Some call for tomato puree, which is thicker and what I found to work the best. Don't get hung up on making and cooking a sauce. When you use fresh dough and good cheeses, the sauce should be a subtle accent, not the main attraction. Second, use good quality ingredients. When you make a recipe with only a few ingredients, make sure they all taste great on their own. If you put a bland tasting tomato on top of a mild and processed pre-shredded cheese, guess what your pizza is going to taste like? Third, the cheese. There is no rule for which cheeses to use as it should be based on your personal preference. I like to use fontina because it's mild and melts like a dream into the sauce, but I counter it with a bit of Pecorino Romano for sharpness. You could use a bit of fresh mozzarella in place of the fontina if you would rather, but I do find fontina to melt better.
Grilled Pizza <span class=

The reason a simple pizza like this tastes so great is because it's layered with flavor. You brush the dough with a garlic oil first, then dollop the sauce on sort of haphazardly (it does not have to be evenly distributed over the entire surface) then the cheese, and finally the tomatoes and basil, salt and pepper. Every flavor melds into everything else. I am loving this recipe.

I rolled my pizza dough really thin and that's why it looks like flatbread. Less crust=happy husband. You can leave yours as thick as you'd like, though.

Grilled Pizza Margherita
adapted loosely from, Robust Trattoria Cooking From Al Forno

makes 1 large pizza

1 recipe Pizza Dough (recipe below)
1/4 cup extra virgin olive oil
2 garlic cloves, minced
1/8 teaspoon crushed red pepper flakes
3/4 cup loosely packed shredded fontina
2 tablespoons freshly grated Pecorino Romano
6 tablespoons canned pureed tomato
6 thin tomato slices, optional
8 basil leaves, torn
Kosher or sea salt

Make the garlic oil: In a small sauce pan or skillet, place the olive oil, garlic, and crushed red pepper flake and bring to a simmer over low heat. Cook for 10 minutes, making sure the garlic doesn't burn. Set aside.

Shred all cheese and place on a plate with the tomato slices and torn basil so all the ingredients are ready to go when you are. Open the can of pureed tomatoes, and have that handy as well along with a tablespoon.

If you use a gas grill, heat on low. If using a charcoal grill, it is hot enough when you can hold your hand over the coals for 3 to 4 seconds at a distance of about 5 inches.

Roll the pizza dough out on a lightly floured surface in a free form circle or rectangle to the thickness of about 1/8-inch. The shape is unimportant but try to maintain an even level of thickness. When grill is hot use your fingertips to lift the dough gently by the 2 corners closest to you, and drape in onto the grill. Catch the loose edge on the grill first and slide the remaining dough into place over the fire. Within a minute the dough will puff slightly, the underside will stiffen, and grill marks will appear.

Using tongs, immediately flip the crust over, onto the coolest part of the grill. Quickly brush the entire surface with the garlic oil. Spoon dollops of the tomato puree over and smear slightly, then scatter the cheeses, tomato, basil and salt.

Slide the pizza back toward the hot coals, but not directly over them. Or if you have a gas grill, check the underside frequently to see if it is burning, and with either grill, rotate if possible so that different sections receive high heat. The pizza is done when the top is bubbly and the cheese melted, about 5 minutes. Serve at once.


Mambo Italiano Pizza Dough

makes enough for 1 large pizza

1 .25 ounce package active dry yeast
1 cup warm water (about 110 degrees)
2 1/4 cups flour
2 tablespoons extra virgin olive oil
1 teaspoon salt
1 teaspoon sugar
1/8 teaspoon white pepper

In a small bowl dissolve the yeast into the water and let sit for about 10 minutes until foamy.

In the bowl of an electric mixer fitted with a dough hook, combine the flour, salt, sugar, white pepper and olive oil. Add in the yeast mixture and mix on low for 3 minutes once all ingredients are incorporated. Take the dough out of the mixer (if the dough is too sticky, add some more flour a tablespoon at a time and knead with your hands on the counter top until smooth). Place the dough in an oiled bowl covered with plastic wrap and let sit at room temperature for 30 minutes or up to an hour. Punch dough down and use or, if making in advance, seal in plastic wrap and place in the refrigerator until ready to use, but i'd say no longer than 4 hours.

If you like breadier dough, cut the flour down to two cups total and use 1 cup bread flour and one cup all purpose flour. I say to cut the flour down because usually bread flour soaks up more water than all purpose, but if you need more flour, go ahead and use it.

Thursday, July 14, 2011

Spicy Papaya Sunrise

Spicy Papaya Sunrise

I hear half the country is in the middle of a wicked heat spell. What in the world? It's still 65 to 70 degrees here and raining everyday. I feel like the weather has hijacked my summer. The news keeps forecasting the weather and saying things like "It's gonna be another wet week here in the high country as we are in the middle of a monsoon season". Hold up. . . Monsoon season? Why do they keep saying that like we have heard it a hundred times before? "Oh, it's just the monsoon season". Excuse me, but I have never heard of us having a freaking monsoon season. The desert? Sure. Thailand? Completely normal (I think), but the Rocky Mountains? Since when, people?!? Am I alone here?


I'm craving the heat. I want to sweat while sitting on my deck. And while I don't want to be insensitive to the people suffering in 100 degree blistering heat, I can't help but want to steal a little bit of it. I thought of this yesterday when I made this spicy papaya sunrise because as I sipped up the refreshing, ice cold beverage I got a chill that wouldn't go away. In fact, I had to put a sweatshirt on. I did finish it though- albeit to the sound of thunder, flashes of lightening and pouring rain. It didn't seem right, but dag-gone-it, I refuse to make hot chocolate in July. And so, I am passing the recipe on to you because papaya's, watermelon and lime just taste better in the sunshine.

Spicy Papaya Sunrise

Fruit hydrates the body two times better than a glass of water (at least that is what I have read) so this drink will do more than it's job for all you parched people. Tropical and juicy, this healthy punch will also do your body good from another angle. By drinking this you get plenty of vitamins A and C. Yay! Jalapeno delivers more than a spicy kick; Anti-inflammatory carotenoids (aka: antioxidants) give the pepper it's bright red skin. About that- my store was out of red jalapenos and that is why you see a green one taking it's place in the picture. You get what you can get, right? I took the seeds out of mine, and used the whole 1/2 of the jalapeno. It was mildly spicy, and I actually added in another 1/4 of the pepper and still, the drink was only slightly spicy so don't be afraid to use it. If you like things hot I suggest that you don't de-seed. I like things hot. If your taste buds are a little wimpier, try using 1/4 of the jalapeno, but please, please, please, don't leave it out.

Spicy Papaya Sunrise
adapted from Whole Living, Martha Stewart via Melanie Simon

serves 1

3/4 cup diced papaya (about 1 medium)
1 cup diced watermelon
1-2 tablespoons lime juice
1/2 red jalapeno (sliced; seeded if desired to reduce heat)
Ice
Slice of lime, for garnish

Puree papaya, watermelon, lime juice, and 1/2 jalapeno in a blender until smooth. Add about 1/4 cups of water, if desired to thin. Taste and add more lime or jalapeno if desired.*Strain through a fine mesh sieve and chill. Serve over ice and garnish with a slice of lime.

* I used a Vita-Mix and so I didn't strain any of the fruit out. The Vita -Mix, for those of you who don't know is like a blender on speed. Pardon the reference, it was honestly all I could think of. It will blend up anything, anyhow and anyway and make it smooth as silk. Plus I wanted all that fiber in my glass, not down the sink.

Monday, July 11, 2011

Zucchini with Parmesan

Zucchini with Parmesan

Those of you who are lucky enough to have a garden are probably up to your ears in zucchini right about now. To those people, I'll just say that I'm considerably envious. My Grandma Burgos used to grow huge plants in her backyard where I would, on occasion, pick off enormous zucchini to bring home to my mom. Garden fresh zucchini is not anything like the supermarket stuff which is always cold and dark solid green with a slightly bitter taste. The zucchini I remember from my Grandmother's garden was nothing like that. Hers was warm from the sun and a yellowish pale green with an almost speckled like pattern. Eating this glorious stuff was always a delight because it was very tender and sweet and only needed a quick steaming and sprinkling of salt and pepper to be delicious.

Zucchini with Parmesan

However, this was back in like, 1997 and zucchini has come a long way since then. I still enjoy simple preparations but honestly, zucchini with Parmesan is my absolute favorite recipe. The zucchini is sauteed in a small batch with olive oil and browned onions. Since you saute in two batches, the pan does not get overcrowded and the zucchini actually browns on the sides which gives them fantastic flavor. If you cook all the zucchini at once, the vegetable gets crowded and steams instead. Still delicious, but not at all the same. I say, be patient with this one and do the two batches thing. You'll be glad you did. The zucchini pictured is not as brown as I normally make because there was a timing issue in the kitchen and I needed to hurry it up. So, don't be afraid to brown it up! When done add some salt, pepper and Parmesan cheese and the final dish is out of this world good. I enjoyed this on the side of a nice, grilled piece of wild Copper River Sockeye salmon, but it's great with chicken and steak as well.

Zucchini with Parmesan
adapted from Barefoot Contessa, Family Style, by Ina Garten

serves 6 to 8

8 medium zucchini
Good olive oil
2 large yellow onions cut in half and sliced 1/2 inch thick (half moons)
Kosher salt
Freshly ground black pepper
1/2 cup freshly grated Parmesan cheese

Remove the ends of the zucchini and cut in half lengthwise. Slice the zucchini diagonally in 1/2-inch slices.

Heat 2 tablespoons of olive oil in a large (12-inch) saute pan and add the onions. Cook for 10 minutes on medium-low heat, until they start to brown. Add half the zucchini, 1 teaspoon salt, and 1/4 teaspoon pepper to the pan and cook, tossing occasionally, for 10 to 15 minutes, until just cooked through. Sprinkle with Parmesan and cook for 30 seconds more. Remove to a serving platter and repeat with the rest of the zucchini. Serve immediately.

Thursday, July 7, 2011

Slab Pie - Blueberry and Strawberry Rhubarb

Slab Pie

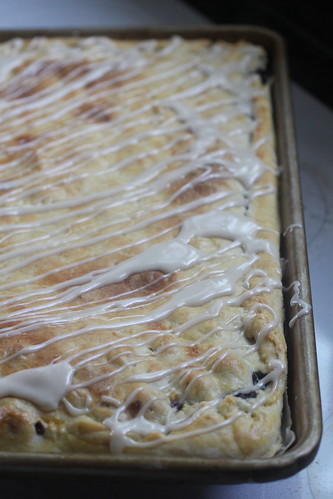
Isn't the name of this one great? I just had to make "slab pie" for the Fourth. Had to
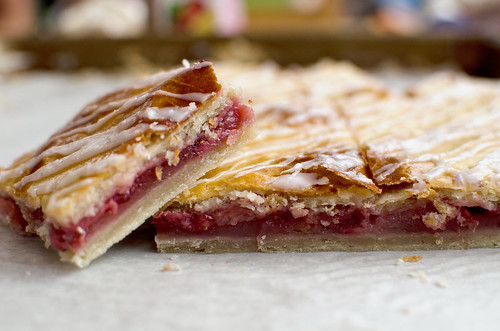
. If you are looking to feed a lot of people, make this. It's basically fruit pie baked up in a large rectangular pan. It feeds an army (anywhere from 16-24) and is highly portable so it's much more convenient to bring this to a party or pot luck than a sweet little 9"pie that only serves eight. When this is done, you drizzle the crust with a simple glaze and cut into squares. It looks like a huge pop tart, so who wouldn't like that? The crust is made with all butter which yields a flaky almost pastry like crust which makes for a flexible but sturdy base so you can actually pick up the squares and eat them with a napkin...no plate necessary. Pie in the hand? Awesome.

Blueberry Slab Pie

I made my fillings with a blueberry and strawberry rhubarb, respectively, but feel free to use any fruit filling you like. Some tips for replacing the blueberries with other fruit: This pie is roughly 100% of a regular pie filling with 150% of the crust. If you are looking to use something besides the fillings provided, you could swap in 6 cups of any other fruit. Adjust the sugar accordingly because you would use less sugar for peaches or berries than you would, say, sour cherries unless you like your pies on the sweeter side. I used quite a bit of sugar for my blueberries, but they were on the tart side. Always try your fruit before you decided how much sugar to use. Adjust the cornstarch too, since different fruits give off varying amounts of liquid. Also, if you have a recipe you like for a fruit pie filling you can use that. Most recipes call for 6 cups of fruit for a standard pie which is how much you'll need for this recipe. That way you know your thickener and sugar is spot-on. Lastly, you could always make your life easier and use canned pie filling. I cannot believe I just suggested that. I suppose we all need a break sometime!

* New note: You can also make filling that doesn't have to be cooked and thickened before baked in the crust. Like a cherry or peach pie for example. Classically, you would just toss the fruit with a variety of spices and or sugar and some sort of thickener and put directly into the crust for baking. For peach pie try: 6 cups of chopped peaches, 2 tablespoons flour, 1/2 cup granulated sugar, 1/2 cup brown sugar, 1 teaspoon lemon juice, 1/2 teaspoon cinnamon, 1/2 teaspoon vanilla. Toss everything together just before pouring into the crust. You don't want to do it ahead of time because the peaches will get too juicy sitting in the sugar. For cherry pie try: 6 cups pitted sour cherries (fresh or frozen will work; if frozen, defrost and drain first)1 cup sugar, 1/4 cup cornstarch, juice of half a lemon and a pinch of salt. Combine everything and pour into the crust and bake.

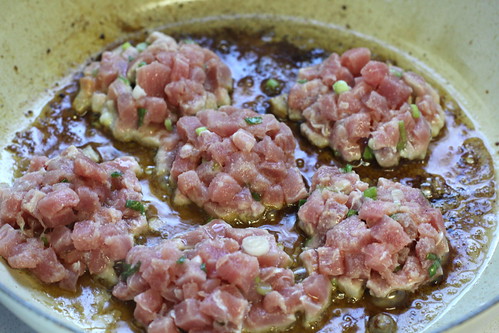
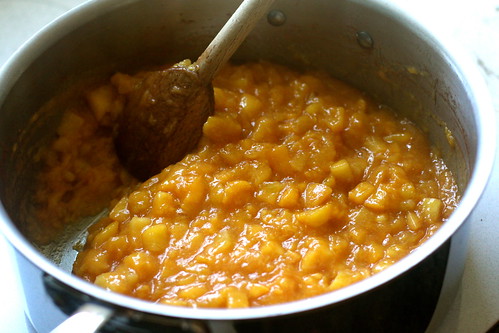
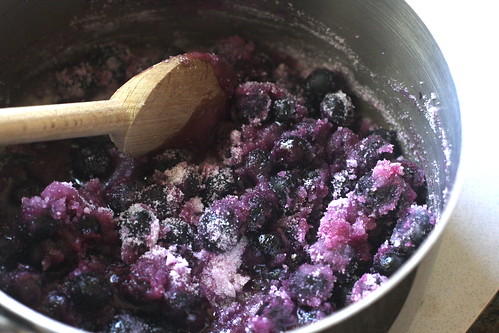
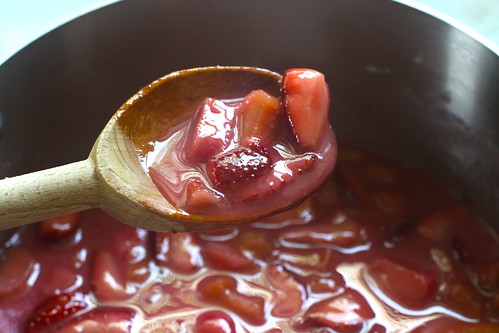
A quick note for people who don't have much experience with cooking a pie filling. I'm a visual person, so I figure pictures will help ensure success. The instructions ask that you cook a cup and a half of the fruit (take note: this is only a small amount of the fruit. You will have fruit left over to mix in later) with the sugar and simmer until all the sugar is dissolved. This might sound wrong since there is no liquid in the pan. Don't worry, the berries will break down a bit and the sugar will melt over low heat, giving you something that looks like this:

IMG_5009

IMG_5049

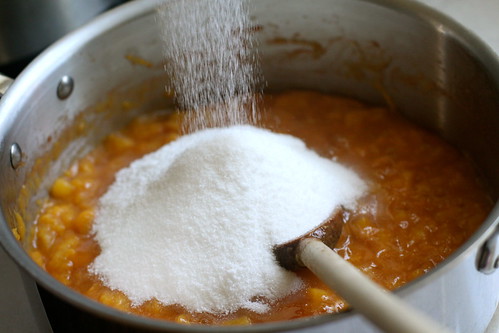
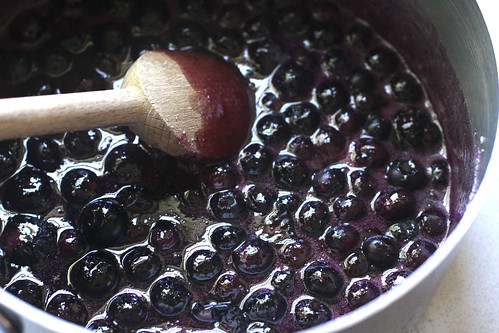
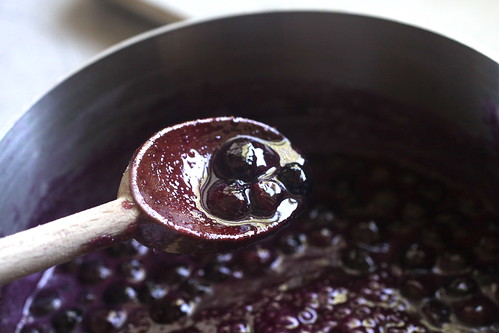
Keep cooking until it the sugar has all melted and become juice. It looks something like this:

IMG_5013

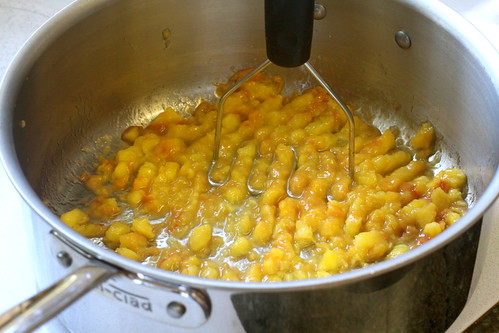
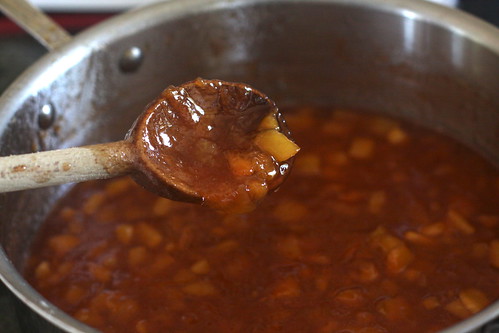
After that, you will be asked to add the cornstarch dissolved in a little water to your filling. Then you will cook said mixture, stirring constantly, until it has thickened, is bubbling and is no longer cloudy, but clear. This is sort of deceiving. You have to cook this mother a while. Like 10-12 minutes or so. It will slightly thicken up after a few minutes, but if you cook it longer, it will thicken even more. Cook until you have the consistency of syrup. It should look something like this:

IMG_5055

IMG_5016

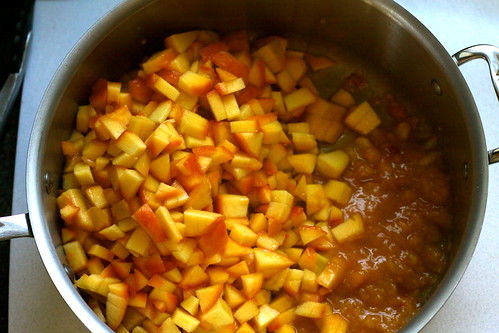
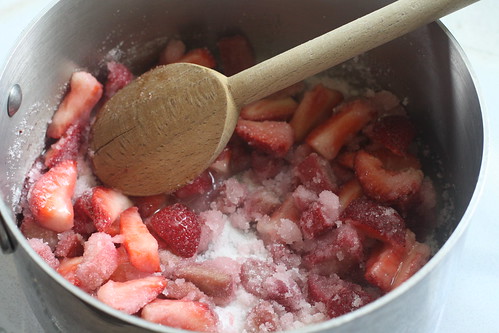
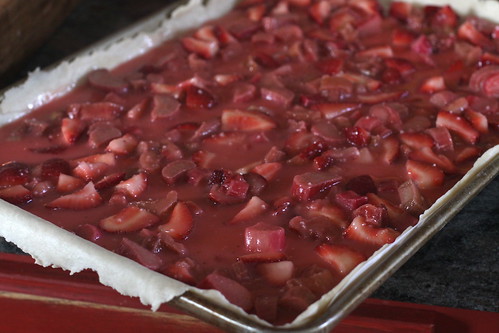
Now you can add the rest of the ingredients:

IMG_5020


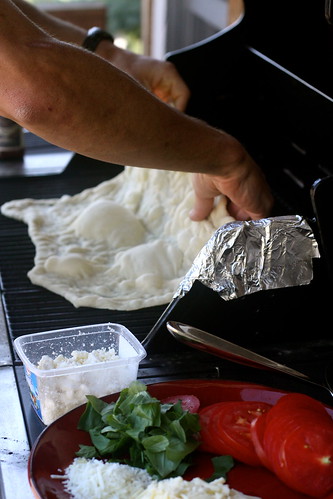
Then, and only then, can you add the rest of the berries and fruit to the mix. The pie crust is easy to make. Don't let anyone tell you it's not. The dough itself is pliable and soft, making it easy to roll out thinly.

IMG_5024

Slab Pie

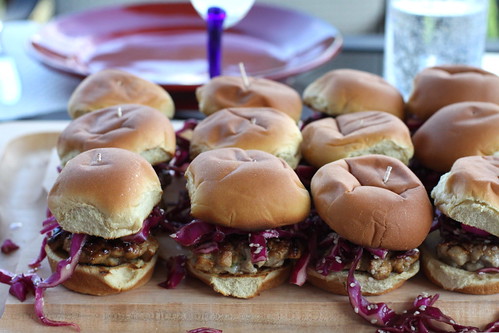
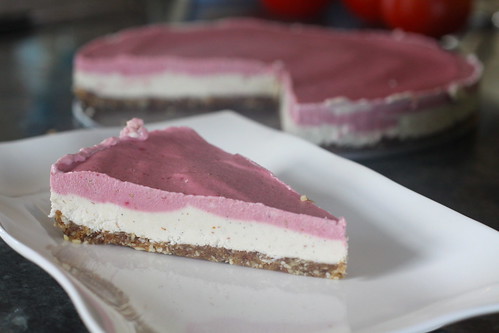
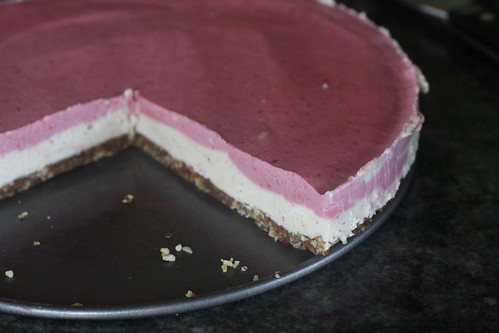
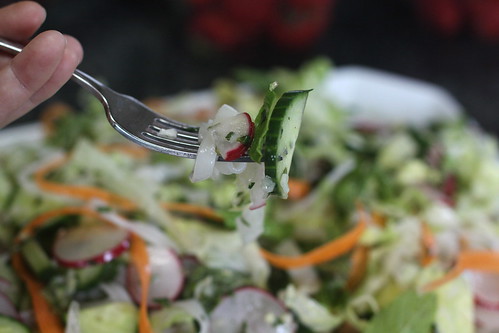
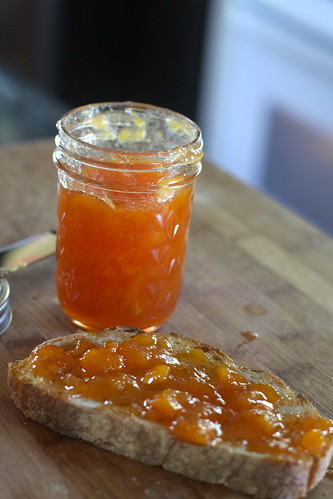
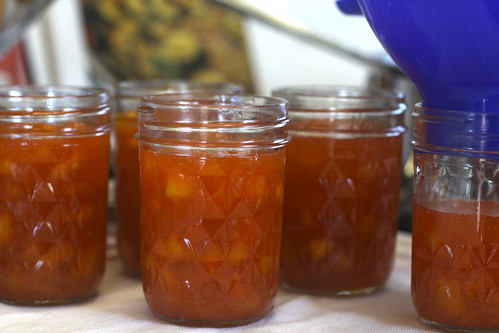
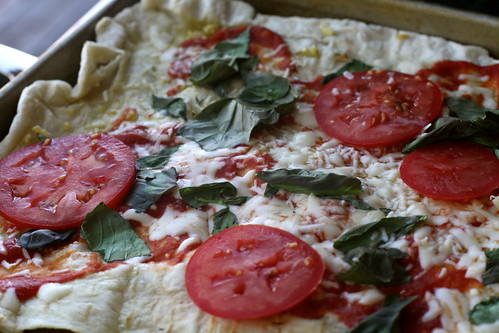
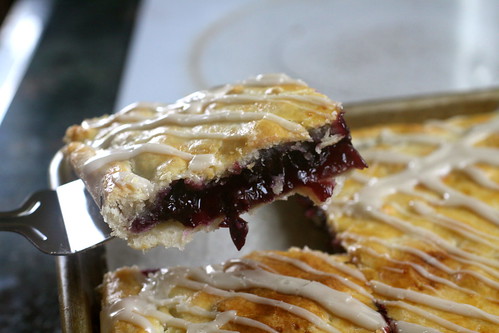
The finished product:

IMG_5041

Slab Pie
adapted from smitten kitchen
serves 20-24

Blueberry Slab Pie

1 recipe All Butter Really Flaky Pie Dough, (recipe below) divided patted into thick rectangles, wrapped in plastic and chilled for at least an hour in the fridge.

6 cups fresh blueberries
1 to 1 1/4 cups sugar
7 tablespoons cornstarch
5 tablespoons water
1 1/2 teaspoon lemon juice
1/2 teaspoon ground cinnamon
2 tablespoons unsalted butter

Glaze:
1 cup confectioners sugar
1 to 2 tablespoons milk

To make the blueberry filling: combine 1 3/4 cup of the blueberries with the sugar in a nonreactive saucepan. Bring to a simmer over low to medium-low heat, stirring occasionally, until the sugar is melted and the mixture is very liquid, about 5 minutes.

Combine the cornstarch and water in a small bowl and whisk the blueberry and sugar mixture into it. Return everything to the pan and cook, stirring constantly, over low heat, until the mixture comes to a boil, thickens and becomes clear-ish (not cloudy). If it does not become clear, continue to cook over low heat for a few more minutes, until it does.

Stir in the remaining filling ingredients except for the blueberries, then add the remaining berries and cool.

Strawberry Rhubarb Filling:

1 recipe All Butter Really Flaky Pie Dough (recipe below)

3 cups strawberries, hulled and sliced
3 cups rhubarb, trimmed and cut into 1/2-inch pieces
7 tablespoons cornstarch
5 tablespoons water
1 1/4 cups sugar
1 1/2 teaspoon lemon juice
1/4 teaspoon vanilla extract
1 tablespoon quick-cooking (instant) tapioca
2 tablespoons unsalted butter, cut into small pieces

To make the Strawberry Rhubarb filling: combine the strawberry and rhubarb in a bowl. Measure out 1 3/4 cup of the fruit and combine it with the sugar in a nonreactive saucepan. Bring to a simmer over low to medium-low heat, stirring occasionally, until the sugar is melted and the mixture is very liquid, about 5 minutes.

Combine the cornstarch and water in a small bowl and whisk the fruit and sugar mixture into it. Return everything to the pan and cook, stirring constantly, over low heat, until the mixture comes to a boil, thickens and becomes clear-ish (not cloudy). If it does not become clear, continue to cook over low heat for a few more minutes, until it does. It might still be slightly milky with this filling and that's okay.

Stir in the remaining filling ingredients except for the strawberries and rhubarb, then add the remaining strawberries and rhubarb and cool.

To assemble the pie: Preheat the oven to 350 degrees. On a lightly floured surface, roll out one of the dough halves into an 18-by-12 inch rectangle. I won't lie: this can be kind of a pain because it is so large. Do your best to work quickly keeping the dough as cold as possible.

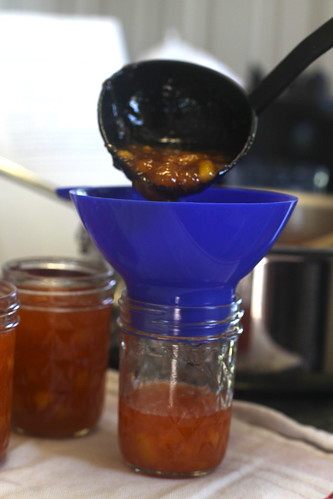
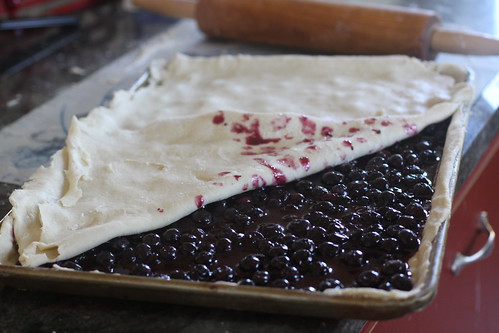
Transfer to a 15-by-10-by-1-inch rimmed baking sheet, (pastry will hang over the sides of the pan). I went ahead and lined mine with parchment, just to ensure I'd be able to easily lift it out. Pour blueberry filling into lined baking sheet; set aside.

On a lightly floured surface, roll out remaining piece of dough into a 16-by-11-inch rectangle. Drape over filling. Bring bottom pastry up and over top pastry. Pinch edges to seal. If need be, rip off pieces of dough from places that could spare some and pinch it together to patch holes or bald spots in other places. Using a fork, prick top crust all over and brush with heavy cream or egg wash.

Bake until crust is golden and filling is bubbling, 40 to 55 minutes. Transfer to a wire rack and cool until just warm tot he touch, about 45 minutes.

In a medium bowl, stir together the confectioners sugar and milk until desired glaze consistency is achieved. Use a spoon to drizzle over top.

Cool the pie for 3-4 hours before cutting. The filling needs time to cool and set up.

All Butter Really Flaky Pie Dough
adapted from smitten kitchen

makes enough dough for one slab pie

3 3/4 cups all purpose flour
1 1/2 tablespoons sugar
1 1/2 teaspoons salt
3 sticks unsalted butter, very cold

1 egg, beaten with 1 tablespoon water, for an egg wash.

Fill a one cup liquid measuring cup with water, and drop in a few ice cubes; set aside. In the bowl of a food processor, pulse together the flour, salt and sugar until blended. Dice the butter into cubes and add it into the food processor. Pulse a few times until the butter is incorporated and is about the size of peas. Next, remove the ice cubes from your measuring cup and pour out some water so it is holding exactly 1 cup. With your machine running, slowly pour 3/4 cup of the water through the chute. Then, very slowly, add the remaining water about a teaspoon at a time just until the dough comes together and forms a ball. Dump the dough out onto a floured surface and knead to incorporate everything. If you have added too much water and the dough seems tacky, sprinkle some flour over the top and knead it in until it is no longer wet. On the other hand, if your dough is falling apart because it is too dry, add some water, a tablespoon at a time and knead until it comes together. You will probably not need the whole cup of water. I had a couple tablespoons left over every time.

Divide the dough in half, and place each half on a large piece of plastic wrap. Shape dough into a rectangle and wrap up. Place dough in the refrigerator for one hour before rolling it out. The dough will keep in the fridge for about a week, but if you don't plan on using it the day it's made, wrap it double in plastic wrap to protect the dough from refrigerator smells.

friday potluck guest host girlichef

Tuesday, July 5, 2011

Guilt Free Chocolate Shake and The Raw Chocolate Milkshake Miracle

Hey everyone!

I hope you had a safe and happy Fourth. I'm guest posting today about chocolate shakes without the guilt. Who's with me? Head on over and visit Katie at Keep Calm and Carry On for more.

Krysta