Thursday, April 28, 2011

Sheryl Crow's Warm Hummus Soup with Cilantro Pesto and Garlicky Pita chips

Warm hummus soup with cilantro pesto

The title of Sheryl Crow's new cookbook: "If It Makes You Healthy". The title Sheryl's sister thought she should have used: "If It Makes You Healthy, Then Why The Hell Are You So Fat?". Ha ha, OK while the last one might be a tad offensive, it's still funny. That is, of course, only if you listen to her music and know what the heck I'm talking about.

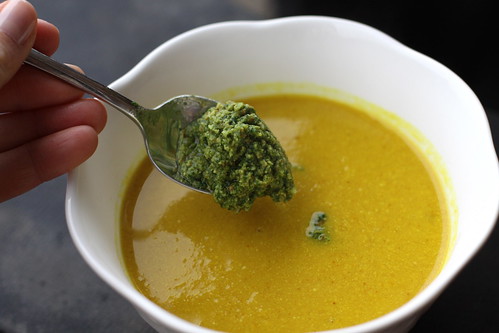
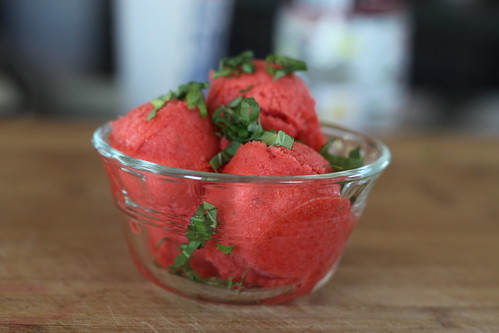
I'm not the biggest fan of hummus, although I find it pleasant enough it's not something I go for or think of making first if you know what I mean. So I went went into this recipe hopeful, but a bit skeptical that it could be as good as our friend Craig (You might remember "Vegan Craig" from this post) said it was. I really like cilantro though, so the pesto element coupled with the garlicky pita chips reeled me in. By the way, if you don't like cilantro, regular pesto made with basil would be just fine to substitute.

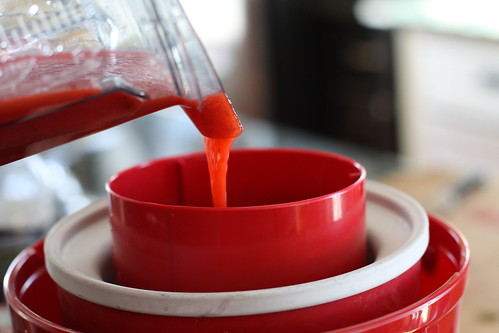
Seriously, this is one of the best soups I have ever had. The flavor was excellent and satisfying. I have to say, I was quite surprised. It is essentially warm, thinned hummus garnished with pita chips and pesto, but somehow it's much more than that. It's different and exciting in some way. On a stormy spring day, which we are experiencing in spades right now, it's warm and comforting and so hits the spot. Keep a few cans of chickpeas (also called garbanzo beans) in the pantry and you can make this just about anytime. If you prefer, garnish the soup with smoked paprika and thick, plain yogurt instead of the pesto. You can bang the soup part out in like 15 minutes flat. You just combine all the ingredients together and puree, cold, and then heat the pureed soup up in a saucepan until warm. I used my vita mix and got a really smooth puree, but a normal blender works just fine. The pesto can be made earlier in the day and kept in the refrigerator and is easy too, providing you have 5 minutes and a food processor.

Just a little FYI: I skipped on the coriander in the soup because I don't care for it. The cilantro pesto is also wonderful served with pasta, grilled meats, and thick, grilled fish steaks. Also, it's great on grilled quesadillas. Please, please, please, I beg of you, use fresh lemon juice for recipes when it calls for it. Lemon does NOT come out of those little yellow squeeze bottles. I don't know what comes out of those things, but it is certainly not lemon juice. I instructed 4-6 cups of vegetable stock because I prefer this soup slightly thicker, so four cups is fine for me but the original recipe calls for six.

Warm Hummus Soup with Cilantro Pesto and Garlicky Pita Chips
adapted from, If It Makes You Healthy, by Sheryl Crow and Chef Chuck White

serves 4-6

Hummus Soup:

4-6 cups organic vegetable stock (or 1 carton veg stock, plus 2 cups water, works too)
Three 14-15-ounce cans organic chickpeas, drained and rinsed
4 tablespoons freshly squeezed lemon juice
3 tablespoons Tahiti paste
3 teaspoons chopped garlic
1 1/2 teaspoons ground cumin
1 teaspoon ground coriander
1 1/2 teaspoons turmeric
Kosher salt and freshly ground black pepper
12-24 Garlicky Pita Chips (recipe follows)
6-8 tablespoons Cilantro Pesto (recipe follows)

In a blender, blend half of the stock, half the chickpeas, half of the lemon juice, half of the Tahiti paste, half of the garlic, and half of the cumin, coriander, and turmeric until smooth, 2-3 minutes. If the soup seems too thick, add water or m ore vegetable stock, 1 tablespoon at a time. Season to taste with salt and pepper. Transfer the first batch of the soup to a large saucepan or pot. Repeat with the remaining half of those ingredients to blend a second batch.

When all the soup is blended and in the pot, bring it to a simmer over medium-low heat. Stir the soup occasionally during heating.

Ladle the soup into shallow bowls and top each serving with 2 or 3 pita chips. Spoon about 1 tablespoon of the pesto on the soup.


Cilantro Pesto:

2 bunches cilantro, thick stems removed (2-3 loosely packed cups)
1/2 cup sliced, toasted almonds
1/2 small jalapeno, seeded and diced (optional)
1 tablespoon freshly squeezed lemon juice
1 1/2 teaspoons chopped garlic
1/2 teaspoon Kosher salt
1/4 cups extra-virgin olive oil

In the bowl of a food processor fitted with the metal blade, process the cilantro, almonds, jalapeno (if using), lemon juice, garlic, and salt until almost smooth. With the processor running, slowly drizzle half of the olive oil into the pesto through the feed tube. When half of the oil is incorporated, scrape down the sides of the food processor. Again, with the motor running, add the remaining oil, or enough to form a smooth, thick pesto.

Using a rubber spatula, scoop the pesto into a container with a tight-fitting lid. Use immediately or refrigerate for up to 3 days. the pesto is best eaten close to making.


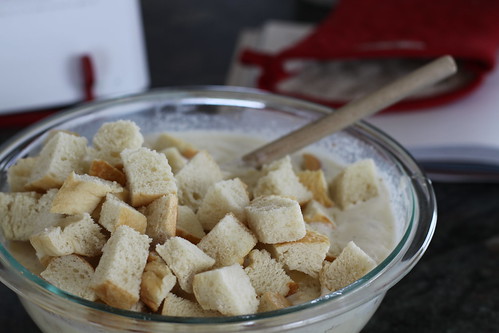
Garlicky Pita Chips:

3 whole-wheat pita rounds, cut into 6 segments (like a pizza)
1 1/2 tablespoons olive oil
2 teaspoons garlic powder
2 teaspoons sea salt
1 teaspoon freshly ground black pepper

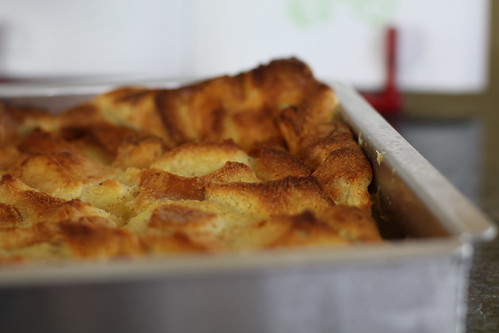
Preheat the oven to 350 degrees. lightly oil 2 large baking sheets. Separate the top of each pita from the bottom, so that each is divided into 2 halves. Transfer the halves to a large mixing bowl and sprinkle with the olive oil, garlic powder salt, and pepper. Toss well but gently so that each pita triangle is well coated.

Lay the pita triangles on the baking sheets in a single layer. Bake for 10-12 minutes or until golden brown.

Let the pita chips cool on the baking sheets to room temperature. use immediately or store in a sealed plastic bag or large lidded container for up to 1 week.

Monday, April 25, 2011

Moist Chocolate Cake

Moist Chocolate Cake

Um, so I'm not sure I need to say much. I certainly don't need to convince you to make this cake. The truth is, I had you at the picture. Admit it. You logged on to check your dashboard and check your reading list. Maybe you saw the blog of one of your sweet friends who wrote about last nights Easter festivities and how they---UH, MOIST CHOCOLATE CAKE...half eaten, frosting smeared, gloriously dark---click. Yeah, I know how it went down. You came to my blog first, didn't you? Listen, I'm not cocky about many things, and I know I had nothing to do with you visiting today. This chocolate cake though? It's captivating, strong, domineering, powerful and it has supernatural capabilities. It makes you click. It draws you in swiftly, sinks in it's claws and doesn't let go. The chances of any of you making this cake in the next week is surely somewhere around 90%. The chances of someone making it today, like right now, before you even read that other friends Easter blog are like, at least 80%. If you don't, (heed my words now), you'll surely dream about it. You'll wake up thinking about it. You won't forget. You can't forget. Need more motivation? Read on.

Moist Chocolate Cake

You throw all the ingredients into a bowl and mix. There is no creaming of the butter and sugar, or alternating between dry and liquid as in typical cake recipes.. Just dump and mix. Sheer genius of a recipe. Also, folks, this cake is not messing around. It is straight forward, deeply chocolaty, moist cake with simple dark chocolate frosting. There is no "dark" chocolate in the actual recipe, but I find that when you use a lot of cocoa in a cake, as you do in this one, it comes out tasting richer and darker, or maybe less sweet if that makes sense. This cake is not pretending to be anything it's not. It's bad ass. It's the Marlon Brando of cakes.

Moist Chocolate Cake

What I love most is this cake tastes how you would expect a flour-less chocolate cake to taste, but has all the texture of a spongy, stick-to-the-roof-of-your-mouth, home style cake. Don't worry about frosting this cake beautifully or perfectly. Just slap it together and get it in your belly as fast as you possibly can because that's what this one is all about.

Moist Chocolate Cake
adapted from www.foodess.com

cake:

2 cups sugar
1 3/4 cups flour
3/4 cup cocoa powder
1 1/2 tsp baking powder
1 1/2 tsp baking soda
1 teaspoon salt
2 eggs
1 cup buttermilk
1/2 cup butter (1 stick), melted
1 tbsp vanilla extract
1 cup hot coffee (or 2 tsp instant coffee in 1 cup boiling water)

Preheat oven to 350 degrees. Butter and flour two 9-inch baking pans and set aside (if you don't do this, the cake will stick). In the large bowl of a standing mixer, stir together the sugar, flour, cocoa, baking powder, baking soda, and salt. Add egg, buttermilk, melted butter and vanilla extract; beat 2 minutes on medium speed. Stir in hot coffee (I just turn the mixer on low and pour it in slowly). pour batter evenly between the two pans and bake on middle rack of oven for 30 minutes, or until toothpick inserted in center comes out clean. Cool at room temperature for 10 minutes, then run a knife along the edges of your pan to loosen the sides and turn out completely on wire racks and cool before frosting.

Frosting:

1 cup (2 sticks) butter, softened
3/4 cup cocoa or three 1 oz. unsweetened chocolate squares, melted (I used a little more than 3/4 cup cocoa)
1 teaspoon vanilla extract
4 cups confectioners sugar
6 tablespoons milk (approx)

In a large bowl, cream butter with an electric mixer. Add cocoa and vanilla. Gradually add sugar, one cup at a time, beating well on medium speed. Scrape sides and bottom of bowl often. When all sugar has been mixed in, icing will appear dry. Add milk and beat at medium speed until light and fluffy, adding more milk if needed. Icing can be kept refrigerated in an airtight container for 2 weeks. Rewhip before using.

For a darker chocolate icing: add an additional 1/4 cup cocoa and an additional tablespoon milk to buttercream icing.

For a thinner consistency: add 3-4 tablespoons light corn syrup

Ganache would also be a great icing for this cake. This is best eaten the day it's made, but its still very good the next day. Any longer and it will start to dry out.

Thursday, April 21, 2011

Tuscan Turkey Sausages with Spicy Beans : Sausages with Fagioli All'uccelletta

Tuscan Turkey Sausage

O Sole Mio! Tuscany on a plate. I promise you, I am so excited about this meal and here's why: It is dead simple and it tastes divine and rustically Italian. I found this recipe from Extra Virgin, airing on the Cooking Channel. Set your DVR. You will not want to miss this show. Actress Debi Mazar (the girlfriend in "Goodfellas" and various other roles) and her Tuscan husband Gabriele (pronounced "gab-rie-ell-ay") blend a beautiful cooking show with killer recipes and reality. They essentially follow the couple and document their lives through food and memories and events. It's my new favorite show mostly because there is substance behind the fluff. I want to seriously make everything they do. Everything. Pizza, pasta, sausage, wine, béchamel, olive oil...I am in serious trouble and so is my ass.

Tuscan Turkey Sausage

I miss pork. It's the number one meat I miss...and eat, on occasion. Ask me if I've cheated with chicken or red meat since going pescotarian almost a year and a half ago and I'll tell you, besides a run-in with a glorious Smashburger, no. Have I really wanted to in two years? Maybe only 4 or 5 times. Pork on the other hand, oh, don't even get me started. I have been known to cheat with bacon, sausage and my main squeeze, prosciutto in small doses. And I knew the second I saw this episode that I would add turkey sausage, a lesser sin, to that list. What? Your saying that since I cheat that I'm not a real pescotarian? Fine. I never liked the label anyway. Besides, I never really was one in the real sense of the word. It just seems like the easiest way to explain why I don't eat meat but still eat seafood.

Tuscan Turkey Sausage

I made this for a woman who had knee surgery in our church so I didn't inflict my sausage loving heart upon my veggie loving husband. It was perfect. She got a meal and I got to cook and taste this wonderful Tuscan creation. I only had a bite and no, I didn't give the sausage I bit to the woman, just for the record. I'm very clean and proper like that. I'll tell you this, though...I could have wolfed the whole thing down. Pescotarian or not. Those Italian know what's up. They school us all. Make this. No, seriously. And watch Extra Virgin on the Cooking Channel and swoon. Bon Apetito! No, seriously...seriously.

This recipe can be cut in half and it would still serve 4.

Tuscan Turkey Sausages with Spicy Beans : Sausages with Fagioli All'uccelletta
adapted from Extra Virgin, Cooking Channel, Debi Mazar and Gabriele Corcos

serves 6

2 tablespoons olive oil
8 turkey sausages
5 garlic cloves, peeled and sliced into chunks
1 pound cherry tomato, quartered
3 dry red hot peppers (optional...for those who don't like it hot)
Salt and freshly ground black pepper
2 (15-ounce) cans cannellini beans, drained and rinsed
5 fresh bay leaves
2 handfuls fresh flat-leaf parsley, leaves picked and chopped

Heat a large high-sided saute pan over medium-heat heat. Add the olive oil to heat. Once hot, add the sausages and brown on all sides, for about 8 minutes total. Remove the sausages from the pan to plate and reserve.

Add the garlic, and saute until golden and brown. With a wooden spoon, stir in the chopped tomatoes and red pepper and season with salt and pepper. Lower the flame, and cover the pan with a lid, simmer for 10 minutes, until the tomatoes have broken down and thickened to a sauce-like consistency.

Add the browned sausages (and any juice left on the plate), beans, and bay leaves to the thickened tomatoes. Stir well and simmer for another 10 minutes.

Add the chopped parsley before serving.

The sausages will sort of leave a crusty dark brown, almost burned film on the bottom of your pot when you brown them. Don't worry. When you add the cool tomatoes and other ingredients it will lift off easily and become a part of the sauce. Also, if you have a grease splatter cover, use that to cover the pan when sausages are browning. Grease likes to fly with this one. If you don't use a pot with tall sides like the recipe suggests or just cover loosely with foil until you are ready to turn them. Your stove will thank you. The hot peppers are optional, so if you don't care for spicy, you are in luck.

Monday, April 18, 2011

No-Bake Chocolate Raspberry Cream Pie

Raspberry Cream Pie

I just got back from a little weekend in Denver for Spring Break so I'll make this short and sweet, like the pie. This pie has intrigued me since I ripped the recipe out of a magazine last Summer for a few reasons. For one, you incorporate real melted chocolate into chocolate cookie crumbs for the crust and I have never seen that done before. Second, there are no "thickeners" in the filling. By that, I mean, no cornstarch, flour, eggs or gelatin. Actually, it's the fresh lemon juice that you add to the sweetened condensed milk, and raspberries (among other ingredients), that reacts in a certain way, and thickens up the whole thing as it sits in the refrigerator. The result is silky clean slices of pie. By the way, I totally took a picture of the magazine pie and posted it up there. The rest are my photo's. My pie was not as pretty when all was said and done because I couldn't adorn it the same way :(

Raspberry Cream Pie

I had to use frozen defrosted raspberries. Don't do this. The point is to have a fresh raspberry pie, after all. I had no choice as they were out of raspberries at my store. I was very sad. While the end result probably tastes almost exactly the same, the color was off because of all the juice you get when berries defrost. It was more the color of boysenberry, than raspberry, but I'm not complaining.

Raspberry Cream Pie

This pie comes together quickly, but allow time for refrigeration. It needs 4 hours, minimum, to firm up. This pie is great but it should be noted that it is a shortcut type of recipe so the taste can't be compared to a true raspberry cream pie. This is lighter, and more reminiscent of yogurt than cream. The filling is just a mix of sweet, bright, and tangy ingredients. Perfect for a BBQ. This would be awesome topped with fresh whipped cream and I am adding it to the final recipe.

Raspberry Cream Pie

No-Bake Chocolate Raspberry Cream Pie
adapted from Bon Appetit, July 2009

7 ounces chocolate wafer cookies (or teddy grahams) about 32, coarsely broken
1/2 cup bittersweet chocolate chips
6 tablespoons (3/4 stick) butter, cut into 1/2-inch cubes
1/4 cup sugar
1 14-ounce can sweetened condensed milk
1/4 cup creme fraiche (or a mix of 1/8 cup sour cream, 1/8 cup whipping cream)
1/4 cup fresh lemon juice
1 teaspoon finely grated lemon zest
2 1/2 cups fresh raspberries (two 6 ounce containers)
Sweetened whipped cream, for topping (optional)

Place cookies in a food processor. using on/off turns, process until finely ground. Place chocolate chips, butter, and sugar in microwave safe bowl. microwave on high at 15-second intervals until melted, stirring occasionally. Add chocolate mixture to processor and blend until combined. Press crumb mixture onto bottom and up sides of 9-inch glass pie dish (do not pack firmly). Chill crust while preparing filling.

Whisk condensed milk, creme fraiche, lemon juice, and lemon zest in a large bowl to blend. Add half of the raspberries. Stir, pressing gently on some raspberries, until raspberries begin to break apart and filling turns pink. Transfer filling to crust. Chill until filling is set, about 4 hours.

Spread sweetened whipped cream over pie, if using, and scatter remaining raspberries over pie. Cut into wedges and serve.


Thursday, April 14, 2011

Bread and Butter Pudding

Bread and Butter Pudding

This makes a fine breakfast as is or topped with some pure maple syrup. It also makes a beautiful dessert, again, as is, or if your feeling fancy, topped with maple syrup and a bit of vanilla bean ice cream and maybe a few chopped almonds. Or, as an alternative, just adorned with some gorgeous seasonal fruit. Actually if you baked this with seasonal fruit inside, it would be sensational. Fruit like raspberries, blackberries, strawberries, blueberries, apricots or peaches would be especially nice. As you can see, this recipe is quite flexible.

Bread and Butter Pudding

The citrus is a welcome addition and it's what makes this stand out from other bread puddings. I actually just used the juice and left out the zest because I have a husband who doesn't particularly appreciate it (he hates the orange rolls I put out every Christmas morning, but loves the cinnamon ones). When he tasted this he could tell there was citrus (the juice) in it, because you could definitely taste it. It lent more of a subtle, nectar like sweetness and in no way overpowered the pudding. It didn't scream orange. It whispered it. He liked it for a change.

The taste is subtle but full and well rounded. Bread and butter pudding is a perfect name for this because that's exactly what it tastes like if you could close your eyes and imagine it. Crusty top and a silky middle. You can't go wrong.

Bread and Butter Pudding

Bread and Butter Pudding
adapted from Good To The Grain, by Kim Boyce

serves 9

Butter for the dish
1 French or Sourdough baguette (8 cups)
5 eggs
3 cups whole milk
1 1/4 cups heavy cream
Zest and juice of 2 oranges (no more than 1/2 cup juice)
3/4 cup sugar
1/2 teaspoon nutmeg
3/4 teaspoon kosher salt
1/4 cup currants (optional)
1 tablespoon cold unsalted butter, finely cubed

Slice the baguette in half length wise and then into long strips, and lastly into small pieces about u1 inch in size. You should have about 8 cups of bread. Spread the bread onto a baking sheet. Position a rack in the middle of the oven. Place the baking sheet in the oven and turn the oven to 350 degrees. (The bread needs time to toast so it doesn't turn to mush while baking in the custard). Toast for about 12 minutes while the oven is warming up, until the bread is mostly dry and crunchy. Remove from the oven and set aside to cool.

Meanwhile, combine the eggs, milk, and cream in a large bowl and mix until thoroughly combined-a whisk works just fine here, but if you have an immersion blender, use that for a quick, smooth blend. Strain the custard into a large bowl. Add the orange zest, juice, sugar, nutmeg, salt, currants, and butter, and stir to combine. Once the bread is cool, add it to the custard. let the bread and custard soak for 10 minutes, stirring a few times so that the custard is absorbed evenly.

Butter a deep10-inch baking dish or dutch oven and pour the bread and custard into it. Arrange the bread that sits above the custard in a rustic fashion, spooning the currants that have fallen tot he bottom of the bowl across the top and into the pockets that form on the top.

Bake for 1 1/2 hours. After about 1 hour, the tips of the bread will be quite dark, just shy of burning, while the custard will not yet be set. To keep the bread from burning, lay a piece of aluminum foil loosely over the top of the pudding dish. Bake until the pudding has puffed up. (mine needed to bake, still covered, for 15 minutes longer because the center was too wobbly to be done after 1 1/2 hours) Allow it to cool in its pan on top of the stove.

The pudding is best served warm or at room temperature the same day it was made. Any leftovers can be wrapped tightly in plastic and refrigerated for 3 days.

I mentioned earlier that I had omitted the orange zest but I didn't tell you that I also left out the currants. They both would have been lovely, but the zest would have made the pudding more orange forward which was something I didn't want. Also, my husband is sort of a bread pudding purist. That means no raisins, which I translated as no currants either. That's fine by me. He was pleased, as was I, so please feel free to adapt to your own tastes.


Monday, April 11, 2011

Beauty Benefits of Olive Oil

I have been wicked sick for over a week now and have not had much time for blogging. This post caught my eye as I love the idea of using olive oil for everything. The following comes from Ciao Florentina, another food blog I subscribe to. I remember watching an interview with some famous actress and she was asked how she kept her skin looking so good. She said she had always used a tiny bit of olive oil as facial moisturizer. How earthy, simple, romatic and glamorous all at the same time. Enjoy!


in love with extra virgin olive oil- All over again !BloodOrange Olive OIl3 7 Beauty Uses For Extra Virgin Olive Oil

I go through gallons of it in my kitchen and just a few weeks ago i fell head over heels for a blood orange infused olive oil from Gourmet -Delights. It is made by crushing together fresh organic Moro blood oranges with tree-ripened California olives.
Since then I’ve been using it not only on my daily salad but also as my favorite beauty product.

For my daily use I stick to the Gourmet Delights brand of extra virgin olive oil, it is a little fruity, full bodied and with a very pure taste.
Now for the best part: both of these top quality extra virgin olive oils are under $20. Thank you Gourmet-Delights !

Her are my Top 7 beauty uses for extra virgin olive oil:

7 Beauty Uses For Extra Virgin Olive Oil

1. Eating. Olive oil is one of the 3 foods permitted by the FDA to contain a health claim benefit on its label. Drizzle it over salads, grilled vegetable, meats and bruschetta to improve your health and have radiant skin.

2. Shaving. Use olive oil instead of shaving cream for an extra smooth and silky finish. However your shower could become quite slippery so be careful getting in and out.

3. Dry Scalp Relief. Condition your scalp with warm olive oil & massage it in as a relief for dry scalp. Leave it on for 20 minutes then wash your hair as usual.

4. Make Up Remover and Face Moisturizer. Use olive oil filled with Vitamin E and antioxidants instead of your regular makeup remover and moisturizer to hydrate and renew, smooth and heal the skin, especially acne scars .

5. Cuticle Oil. Use it to help moisturize, repair and protect the cuticle against damage.

6. Soothing Oil. Apply to rashes for soothing, like diaper rash and sun burn.

7. Anti Frizz. Apply a couple of drops in the palm of your hand, rub gently and run your fingers through frizzy hair to tame it, add shine and condition.


    Wednesday, April 6, 2011

    Chili Cheese Fries (vegetarian)

    Chili Cheese Fries

    Good news! You can now eat chili cheese fries for dinner and not feel bad about it. Over here, we like this idea for family night. Jeremy, my husband said that growing up his mom would make a big plate of nachos for family night and he thought it was so cool because nachos were definitely not the usual. Nachos were informal and fun. Nachos are also out of the question for my family because of all the negatives when living with a complete health nut. Tortilla chips? No. Gobs of cheese? Nada. Taco meat or grilled steak or chicken? Deal breaker. What's left is shredded lettuce and jalapenos and no one wants salad on fun family night. I never would have entertained the thought of serving chili cheese fries either until that fateful day when I saw this recipe for vegetarian chili from The Cooking Photographer's website. I saw the picture. The chili looked thick and smokey. Don't ask me how I got a flavor from a picture. I do that sometimes, and in this case, I was right. The reason I had never thought of doing veggie chili for cheese fries is that I needed the chili to stick to the fry. If you go to pick up a fry and it's just bean chili the beans have a tendency to roll off. Not cool. This chili doesn't do that. It's thick. You actually put a can of refried beans into the pot and it "melts" and becomes part of the sauce that holds it all together. The finished product is meatless, smokey, thick and rich with tons of flavor. Just the thing you want to drape over some hot fries. Plus the ingredients call for fun stuff like coffee and beer. I had to make it.

    Oh right, fries. That was a problem. My husband loves french fries but wouldn't necessarily be thrilled about consuming them for his main course at dinner...unless...I baked them! Eureka! That thick chili draping over those hot fries topped with shredded cheddar cheese.

    Oh right, the cheese. If you remember, this was the no-no part of why the nachos were very obviously not going to fly at our dinner table. However...This chili looked so good and sounded so perfect that if Jeremy just topped his chili fries with raw onions and hot pepper rings (I love the acidity of vinegary hot peppers with chili fries) then maybe he didn't need the cheese. No. No, he didn't. Can I just tell you that when I came to this conclusion, I felt like I had won the lottery. I was going to have chili cheese fries, one of my favorite foods, for dinner, and it was going to be fun for family night and Jeremy was actually going to like it. Hot-dog!

    This recipe makes a lot of chili. Two batches in fact, but I don't recommend halving it. I made it all, and froze what we didn't use for another chili fry night. Which was the other night, when I took these pictures. It was great to only have to cut potatoes and roast them for dinner to be complete.

    Chili Cheese Fries

    Top ten reasons for making the chili in a big batch so you can freeze for later:

    10) When you are lazy and don't want to cook...oh look! There's chili in the freezer!
    9) Your friends come over and stay until dinner but you have no food, oh look! There's chili in the freezer!
    8) It's snowing and you don't want to run to the grocery, you remember the chili in the freezer.
    7)When you are lazy and don't want to cook...oh look! There's chili in the freezer!
    6)
    5)
    4)
    3)
    2)
    1)

    OK, so all the reasons are the same. Either you are lazy or met with unexpected company or you are lazy again. End of story. Freezing the chili really is a good idea even if I can't think of more than two legitimate reasons why. I suppose in order for this all to work out you would have to have potatoes on hand for the fries, as well. Always buy potatoes, just in case. All our bases are covered now and you are ready to head to chili cheese fry nirvana twice with very little guilt. I sometimes make these using sweet potatoes instead of white, and sans cheese. It's just as good! It's a win-win.

    Chili Cheese Fries
    serves 4

    For the oven fries:

    4 Russet potatoes (figure 1 potato per person, so if you need more, plan accordingly)
    2 tablespoons olive oil
    salt and pepper (I used Lawry's salt as well)

    Preheat the oven to 425 degrees. Cut each potato into wedges or planks to make fries. Any size will do as long as they are not ridiculously big or small, obviously. Coat the fries with the olive oil on a sheet pan and sprinkle with salt and pepper. Spread potatoes out so they are not touching each other (sometimes mine overlap a bit). This will help them brown and crisp correctly. If you need to, separate your potatoes onto two separate sheet pans and cook them one by one. I only have one oven, so I can't cook them at the same time. Cook for 20 minutes, and flip with a spatula. Close oven door and turn the heat up to 450 degrees. Roast for 15 minutes more or until crisp and a bit browned. 


    Vegetarian Chili
    recipe adapted from Laura Flowers at TheCookingPhotographer.com

    makes 8-9 chili cheese fry servings

    1 medium sized onion
    1 (15 ounce) can dark red kidney beans
    1 (15 ounce) can black beans
    2 (15 ounce) cans chili beans in chili sauce
    2 (16 ounce) cans vegetarian refried beans
    1 (7 ounce) can fire roasted mild diced green chilies
    1 (16 ounce) jar chunky salsa, mild
    1 cup beer, amber or darker

    1/3 cup brewed coffee
    2 tablespoons olive oil
    1 tablespoon chili powder
    2 teaspoons ground cumin
    1 teaspoon onion powder
    1 teaspoon white vinegar
    1 1/2 teaspoons sea salt 
    pepper

    For topping: Cheese and pickled peppers, or mild banana peppers. I like acidity and spicy with my chili fries. It makes it in my opinion.

    Saute the onion in some olive oil in a big pot over medium heat. Add the rest of the ingredients except vinegar and bring up to a simmer. Simmer for 30 minutes, stirring occasionally to keep the refried beans from sticking to the bottom of the pot. Add vinegar at the end of cooking time, then taste for salt and pepper. Adjust seasonings accordingly.

    After you have served the first round of chili cheese fries, cool the remaining chili on the stove, then pack it into Ziplock Freezer Bags and freeze for the next use.

    Holy long post. Sorry. I have been so sick the past week! I guess I'm making up for lost blogging!

    Friday, April 1, 2011

    Strawberry Basil Sorbet

    Strawberry Basil Sorbet

    My daughter needs more attention. I don't think baking cookies or pizza lunches at Ciao Gelato do it for her anymore. My first tip off? She doesn't bake cookies or have pizza lunches with me at Ciao Gelato. Jeremiah does, but we are not talking about him. We are dealing with a 9 year old girl who has acted like she was 5 years older at any given point in her life. So really, I have a teenager, minus all the phone calls. Oh, she'd gab away if she could. Kids her age just don't do that yet. Instead, her talking target is me. My girl is crazy dramatic, like her momma, and loves to talk. And talk. And talk. And talk. And talk. And talk. And honestly, it is downright wearing. She doesn't understand when to stop and easily goes into over drive. It's like that social sensor that warns us when we have said too much, talked too long and tells us to shut-up so that someone else can get a word in edge-wise. Yeah, she doesn't have that. Neither does my Grandpa. It's inevitable. If you listen to one story and laugh, she launches into another. If you listen to the second story and laugh, she fires right out with another one. If you listen to that, it will lead into another story and another. It's endless. Believe me, I have tried to listen intentionally without stopping her. I decided one day that for as long as she'd talk, I'd listen, engage her, ask questions. This was simply...Not. Possible. NOT. POSSIBLE. She will talk, and talk, and talk. Jeremy regularly warns the kids to not use up all their words for the day. Yeah, come dinner time Jeremy has been know to shut everyone down. Decree a no-talk zone because "the kids have used all their words for the day". I'm being serious. It usually lasts 30 seconds. Maybe. It's very necessary. That 30 seconds is precious. Sometimes, when Isabella is on a roll and has been talking non-stop for a while she will run out of things to say and stories to tell so her answer is to start making up "jokes". Jokes like this:

    Isabella: Mom, What did the broccoli say to the orange?
    Me: What?
    Isabella: Stop talking to me you fruit!
    Me: ha, ha, ha (forced laughter)

    She will even fill up spaces or gaps in the conversation with words while she searches and grapples with her mind for something...anything else to say.

    Isabella: OK, OK, OK, I have another one, um. Ummmm. Wait! How did it go? Oh yeah! Wait. Um, ummmmm, OK, so the...Wait! I forget. Lily told Anthony a funny joke in school and it has something to do with...Oh! I don't know! Want to hear one I just make up? OK, OK, OK. Um. uhhhhhhhhhhhh, uhhhhhhhh, So the lady, no wait, sorry! The broccoli again, you know the broccoli from the other joke? (yes, Isabella we understand) well, OK, knock, knock?

    Me: Who's there?
    Isabella: The head
    (long pause)
    Me: The head who
    Isabella: the head of broccoli...get it? The HEAD of broccoli?
    (blank stare)

    This morning she just stared at Jeremy and I from across the counter and said "How bout that airline food?" I was like "huh?". She repeats, cracking up half way through "How bout that airline food?" I say I don't understand. She says "It's a joke. You are supposed to think it's funny." Her saying "How bout that airline food" is a joke. Don't you get it? Me neither.

    IMG_3823

    I feel bad about it because I love her, and she is an engaging, funny little kid (jokes above are not indicative of her charm or humor) but after so many of these incidents, she has to be shut down. It's for her own good. Or my good. I just cannot be talked at all day long. Nothing drives me nuts like being bombarded with talking...for long periods of time. Or short periods of time if it's several kids talking at once, which is usually the case. I have to shut them all down. I want to listen. I do. It's just that I also have to fold the laundry, put it away, feed Olivia her snack, fill her sippy, oh, I have to wash it out first? Approve Jeremiah and Isabella's after school snack, remember to grab my other jacket from upstairs, charge my phone, get the spelling words out and get Isabella working on them, quiz her on the bible verse for the week, return a phone call, check my e-mail, write back, sweep, prep dinner, pee, and finally fill up my wine glass because...damn.

    IMG_3833

    I would really like to be a good mom. When my kids grow up and they look back on their childhood I would like them to say man, that was fun. I love my parents. They were always there. So supportive, loving, and encouraging. NOT remember how there was always "quiet Sunday?" not Sunday but "QUIET Sunday?" and we couldn't talk all morning because Mom and Dad were (trying) to read the Bible and they actually wanted to concentrate, but we talked anyway, relentlessly? And got in trouble. Over and over again? Man, that was a blast! Those were the days! Riiiiiiiight. Yep, we are guilty of "quiet" Sunday. Not even gonna lie.

    I recognize it's my job to take charge. This is my life and my children's adolescence. I'll be darned if I'm going to recognize a problem and ignore it. So I'm taking charge. This week starts the first of many dates with my children. Jeremy and I will take one child out for focused, special time regularly. I will be away from my responsibilities at home and therefore be able to totally absorb, and be in the moment with that particular child. I'm starting with Isabella. We will take her out to dinner this week and do whatever she wants to do. I will ask questions. I will enjoy her and dag-nab-it, if that includes jokes about the cob knocking on the corn's door well, then, great. I can take it coach, because she's worth it and my attention.

    I made something special for my kids this week. A love offering if you will, for all the times I told them to be quiet and leave me alone while I did something. I made strawberry sorbet. It was super easy and quick as sorbets are just sugar and fruit that is frozen. I know what you are thinking. My extraordinary "love gift" for ignoring my children was the easiest of all desserts, took 5 minutes, no cooking and three ingredients. Well, to that I say...You should have seen their faces when I served it. :)

    Strawberry Basil Sorbet

    I made this "fancy" by garnishing it with fresh basil. I love basil and strawberry together and since my kids have grown up with a foodie Mom, they didn't even question it. Basil and strawberry? Sure, why not? There is something about homemade ice creams and sorbets that make me feel like an accomplished cook. They are simple in essence, but when you sit down to eat, and it tastes just like you bought it in a store, bursting with fresh fruit flavors and balanced with both tart and sweet from the sugar, I have this overwhelming sense of I made this. I MADE this and it's good.

    You know what else is good about strawberry sorbet? When kids are eating it, they are quiet as church mice.

    Strawberry Sorbet
    adapted from Bouchon, by Thomas Keller

    makes about 1 quart

    2 pounds fresh strawberries
    1 1/4 cups sugar ( I used just 1 cup)
    2 tablespoons fresh lime juice
    Fresh basil, in ribbons for garnish

    Combine the strawberries, sugar, and lime juice in a blender and blend to a puree. Strain to remove the seeds, if desired. Refrigerate until cold.

    Transfer to an ice cream machine and freeze according to the manufacturer's instructions.

    Just before serving, sprinkle basil, if using on top of sorbet.

    You don't need to strain the mixture before freezing if you have a powerful blender, like a vita-mix; but if you don't, you may want to strain the mixture to remove any seeds. I only had 1 pound of fresh strawberries so I used frozen strawberries which I already had in my freezer to make up the other pound called for in the recipe. It was perfect because I didn't even need to refrigerate my finished mixture because it was already very cold from the frozen fruit.

    I'm writing this part of the post after my date with Isabella tonight. It's was great. My Grandma watched the kids for us while we took Isabella out. Anyway we went out to the Canton, a local Chinese restaurant we never go to because it's quiet and we have three kids. It doesn't work well. But that is where Isabella wanted to go and it was great. We drank hot tea and slurped hot and sour soup and I listened to her. She didn't talk nearly as much as I thought she would. Maybe when she is not competing with younger siblings she doesn't need to say much. We had a delightful time. But on the next date, I hope she talks more. I'm warped like that.