You know when you type out your name and it looks strange, like so familiar that it's foreign? Yeah, I just did that.
Tuesday, November 8, 2011
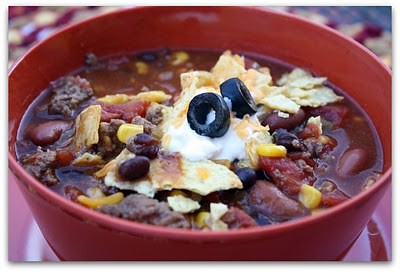
Vegetarian Chili
Thursday, November 3, 2011
Stress Free Thanksgiving Guide
1) Get organized- a few days before Thanksgiving go through your fridge and pitch everything you don't need (old leftovers, that cocktail sauce you used once, etc). If you are lucky enough to have an extra fridge in the garage, clean that out as well or move items from your main fridge into it to create more space. An organized fridge is a huge stress reliever.
2) A few weeks ahead plan your menu. Gather your recipes and give them the once over, noting temperatures and times and think about how you will strategize cooking. Make sure a few things get cooked in the oven and a few things on the stove. If you are hosting a pot luck, designate who should bring what so you don't wind up with duplicates of the same dish. Tell people what you will be handling, and ask what they would like to bring. Also, it is not rude to mention that you could use another green vegetable for the table, and so fourth. If you are terrified of the turkey, it's fine to ask someone else to bring it. It can rest on the car ride over! Make your pie dough. The dough can be made and frozen up to three months in advance and thawed just before baking. You can also make it and keep in the fridge a few days before Thanksgiving if you are like me and like things fresh.
3) A few days before- buy the wine and chill the white and champagne. Buy something simple like cheese and grapes to put out for an appetizer while you cook away. You'll be glad you have something to munch on, especially if you have help in the kitchen. Buy and table decorations needed as well. Thaw the turkey (a turkey can take anywhere from one to six days to thaw in a regrigerator. I would bet on three days as long as you don't have a massive turkey. The rule of thumb is one day in the fridge for every four or five pounds.) Prep all of your vegetables and store in containers or ziplock bags. Label, so you don't get confused. This puts you one step ahead when you begin cooking. Chopping vegetables can be sort of a time hog!
4) Day before- Prepare cranberry sauce and casseroles. Cover and store in the refrigerator. I take a sharpie and write on the plastic wrap covering casseroles how long they need to bake and at what temperature so I don't need to look again. Most likely they will just need warming through. The day of, you can take the casseroles out of the fridge and allow to set out at room temperature for an hour or two to take the chill off. You can warm these up in the oven after your turkey is cooked and resting. Thaw pie crust in the fridge if you have them made ahead and stored in the freezer. My favorite no-fail pie crust is Ina Gartens. Make mashed potatoes. They can be made the day before and warmed up very slowly over low heat when needed. Add milk to moisten as needed.
5) Day of- Turn music on to get with the festive mood.
Set the table and arrange centerpieces first thing. The only items I make from scratch the day of Thanksgiving are the turkey, the stuffing and the pies. I make the pies in the morning (usually an apple, pumpkin and pecan) and store the pumpkin in the fridge and pecan and apple are fine at room temperature. Next, I make and bake the stuffing so it is cooked through and only needs warming before sitting down. Then I tackle the turkey. I make sure I know exactly what time I need to put that sucker in the oven so it is ready when I need it. Remember to calculate resting time into that equation. You can warm all the sides in the oven after the turkey comes out. You will most likely have a good 30-35 minutes needed for the turkey to rest and then you'll have to carve it before sitting, so there is plenty of time for the sides to warm up. Use that time to warm the cranberry sauce and mashed potatoes (and collard greens if you are at my house) on the stove top. Then, whip your cream for pies and store in the refrigerator until you are ready for it. You'll be glad you did that before the meal and whipped cream will store fine for a couple hours after beaten.
6) Give props- To give all potluck cooks their due, write the menu-along with each cook's name beside his or her dish to post on a chalkboard or side board.
7) After the meal have dry dish towels ready for anyone who asks. Don't be crazy. Let people help you clean if they offer. You don't need to direct people on where the gravy boat goes and so fourth (that drives me mad because I cannot mulitask). Just clear a space on a countertop and have people dry the dishes and leave them there for you to put away later.
8) Don't waste that turkey carcass! After you take the meat off the bones, store it in the fridge and make turkey stock with it the next day. Just place the carcass in a large stockpot, fill with water, herbs (I like thyme, parsley and dill), raw onions, carrots and celery and garlic (which you will probably have left over anyway, plenty of salt and pepper and let it simmer together for 1 1/2 hours. Not up for cooking so soon after the big meal? You can also wrap the carcass up well and freeze until you can face it again. :)
The ghost of my family's Thanksgiving's past:
My sister, me and mom
Ready to eat!
The table
My son helping me get the desserts ready (Thanksgiving 2008)
I wish everyone a happy, organized and stress free Thanksgiving this year!
Monday, October 31, 2011
Muffin Pan Tacos (vegetarian) and A Halloween Sneak Peak
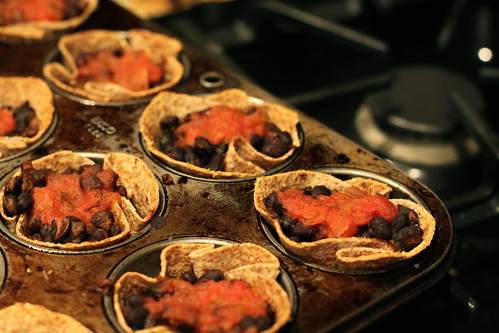
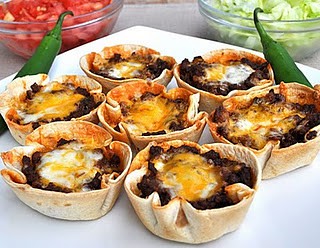
excuse the grease stained muffin pan
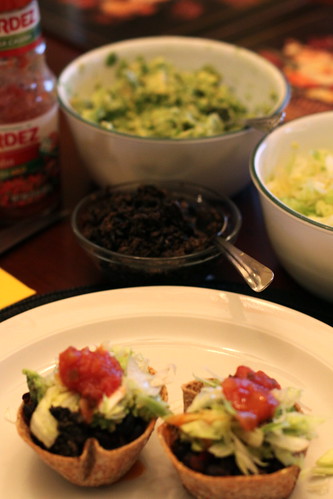
The other changes included getting rid of the meat and replacing it with a well seasoned black bean filling (I actually stole the recipe from a black bean taquito) and omitting the cheese. So actually these are vegan. I love cheese as much as the next girl but there is so much flavor going on in this dish you don't really need it and I'd rather save my calories (and...I'm still on my cleanse). However, if you can't imagine a taco without cheese by all means, just top the black bean filling with a pinch or two of cheddar and bake as directed.
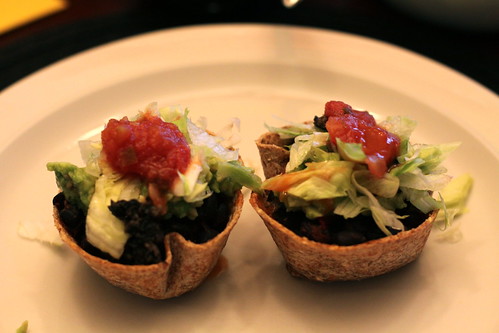
You can pick these up and eat them with your hand, but after I snapped the glamour shot above, I assaulted that taco with an onslaught of shredded lettuce, guacamole, black olives, cilantro, more salsa and hot sauce. I was kind of like a salad, but not really. It was much too delicious to be a salad. More like cheese-less nachos with tons of fresh crisp ingredients on each bite. Yummy, yummy in your tummy.
A mango salsa would be great with these as well. Mangos and black beans are perfect together even with all the other toppings.
Also, here's a sneak peak of Halloween tonight. Our neighborhood had a trick or treat on Saturday and all the kids dressed up and went door to door. This is different for them because our town celebrates Halloween down town. All the businesses hand out candy and that's where everyone gathers. It's really fun and a mad house down there!
Isabella as Elizabeth Swan from "Pirates Of The Caribbean" and Olivia as a flower fairy
Jeremiah as a dinosaur and his friend Will as Spider man
We are not dressing up this year :( we didn't have a party to go to or anything so it's all about the kids. But I'll leave you with pic's from two of my favorite Halloweens:
What's a 7 months pregnant woman supposed to be? Juno!! I loved this.
This was a huge Halloween party we had at Mambo Italiano after we bought the restaurant. So much fun! I was Sleeping Beauty and Jeremy was the Prince.
Muffin Pan Tacos
adapted from naturallyella.com and doyouknowthemuffinpan.com
makes 12 muffin cups- serves 3-4
FOR THE MUFFIN PAN TACOS:
1 medium yellow onion, chopped
2 cloves garlic, chopped
1/2 to 1 small jalapeno, seeded and diced (1/2 will not be spicy)
2 tablespoons olive oil
1 teaspoon paprika
1/2 teaspoon cumin
1/4 teaspoon cayenne pepper (optional)
1 teaspoon kosher salt
2 cans black beans, drained
a big handful of chopped cilantro (about 1/4 cup chopped)
12 Ezekiel tortillas or flour tortillas
Herdez mild tomato salsa
FOR ASSEMBLY AND TOPPING:
Shredded Iceburg lettuce, for topping (about 3 cups)
Cholula hot sauce
2 handfuls cilantro, chopped
sour cream (optional: for non-vegan only)
Pam spray, for muffin tins
Guacamole (recipe follows- or store bought)
FOR QUICK GUACAMOLE:
6 ripe avocados
1/2 teaspoon garlic salt
1/2 a lemon
Preheat oven to 350 degrees.
In a pan, heat olive oil over medium heat. Saute onion and jalapeno pepper until onion becomes translucent and starts to brown. Stir in garlic, cumin, paprika, salt, and continue to cook for 1-2 more minutes. Add in black beans and cilantro, cooking until beans are heated through-two to three minutes more. Turn off heat and set aside until ready to use.
Cut 4-inch diameter circles out of the tortillas. The easiest way is to use a standard margarita glass as your guide and cut around with either kitchen shears or a pizza cutter. Save leftovers to make chips some other time. Wrap tortilla circles 3 or 4 at a time in a barely damp paper towel and microwave for 30 seconds to soften. mold the circles into a lightly greased muffin tin. Spoon the black bean mixture evenly between the cups, then top with 1 teaspoon of salsa each. Bake for 20 minutes.
While the bean cups are baking, shred your lettuce, then chop avocados and ix with the lemon and garlic salt to make a quick guacamole. Taste and add more salt or lemon if needed.
When muffin cups are done just pop them out and top with your favorite toppings.
Happy Halloween Everyone!
Thursday, October 27, 2011
Calming Fresh Ginger-Mint Tea
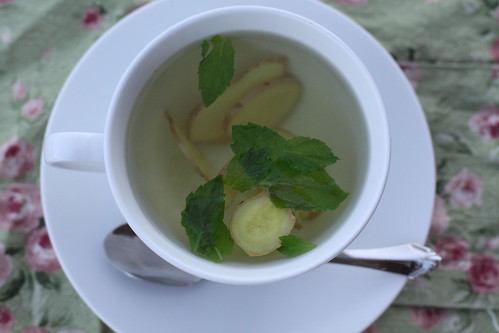
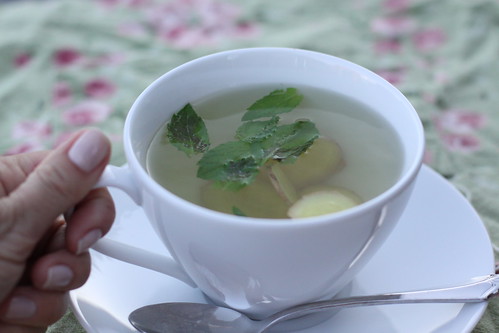
Now, Jeremy and I regularly sit together after the kids are in bed and enjoy this tea. I had never thought about using the actual root to brew tea, but what the hay? I'm glad this is a thing for us now. Sometimes we peel the root and chop it up to add to our water. But most times we slice thin rounds (a serrated knife gets the cleanest and most precise cut) and leave the skin on. Sometimes the ginger sinks to the bottom of the cups and other times it floats. I don't really mind this, but if you do, I recommend the peel and chop method because it seems like peeled, chunkier pieces are more likely to sink. But sliced thinly is prettier so you decide. Sometimes we add mint (like in this recipe) but some of the time we like ours straight up. To make it that way, just omit the mint.
You only need about an inch of ginger root for each mug. If you know you have big coffee cups, use 1 1/2 to 2 inches. Let it brew in the hot water for a good 5 minutes before tasting. The tea will be light at first, and get stronger as you sip it. You will feel a good and spicy warm burn down your throat as the ginger gets stronger. We love this actually, and it's not uncomfortable at all just so long as you expect it. Ginger root varies in potency so play around with the measurements. If it was too light using 1 inch, add more the second time around, and so on.
If you have a cold, I image a squeeze of lemon and teaspoon of honey would be good editions.
Fresh Ginger-Mint Tea
adapted from The Doctor Oz Show
makes 1
Boiling water
1-inch un-peeled thinly sliced ginger root (serrated knife works best) or peeled and chopped
5 fresh mint leaves
Place the ginger in the bottom of your mug. Add boiling water and mint and let sit for 5 minutes. Sip and enjoy.
Hello, antioxidants!
Tuesday, October 25, 2011
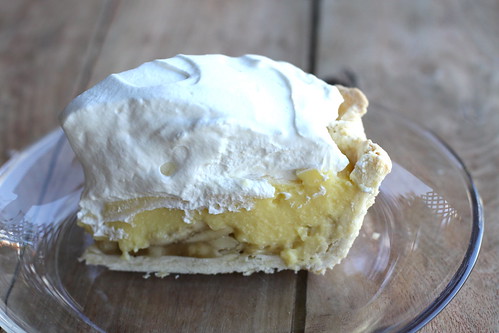
Sky High Classic Banana Cream Pie
1) I like lots of bananas
2) I like a lot of filling. I want it to fill almost the entire pie shell and be creamy but also stiff enough to cut clean slices
3) I like a huge dome of whipped cream on top.
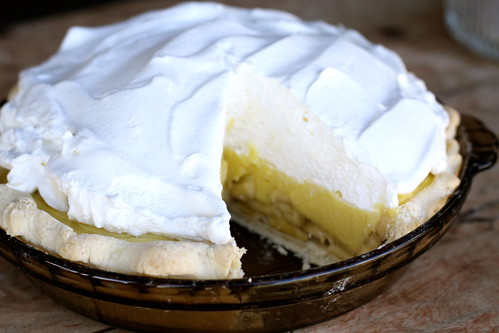
You might say, I like my banana cream pie nice and fittingly, indulgent. The picture below was snapped in haste (because I wanted to eat it) does not do the pie justice. It looks like the whipped cream is overtaking the pie leaving a bit of filling at the bottom. I did whip a lot of cream. This is true. But I whipped it very, very softly so when I went to cut a slice, it weeped down into the side of the filling and covered it up. I will suggest whipping your cream until it can hold soft peaks for yours. I didn't really care what it looked like at that point because as soon as I took a bite and my mouth filled with cold, sweet cream and vanilla, butter crust and pudding, I was done for. This is perfect pie. I'll say it. Perfect classic pie.
The instructions are lengthy but it's because it includes homemade pie crust. . You can always use a store bought crust and skip it. Just make sure to follow the instructions on the package for baking it before filling.
Sky High Classic Banana Cream Pie
FOR THE PIE CRUST: makes 2 crusts (you only need one for this recipe)
12 tablespoons (1 1/2 sticks) very cold unsalted butter
3 cups all-purpose flour
1 teaspoon kosher salt
1 tablespoon sugar
1/3 cup very cold vegetable shortening
8-10 tablespoons ice water
FOR THE FILLING:
3 ripe bananas, peeled and sliced 1/4-inch thick
2 1/4 cups whole milk
3/4 cup sugar
6 tablespoons corn starch
3 eggs
1/4 teaspoon salt
4 tablespoons unsalted butter
1 1/2 teaspoons vanilla
2 cups heavy whipping cream, for topping
5-6 tablespoons powdered sugar, for whipped cream
For the pie crust: dice the butter and return it to the refrigerator while you prepare the flour mixture. Place the flour, salt, and sugar in the bowl of a food processor fitted with a steel blade and pulse a few times to mix. Add the butter and shortening. Pulse 8 to 12 times, until the butter is the size of peas. With the machine running, pour the ice water down the feed tube and pulse the machine until the dough begins to form a ball. Dump out on a floured board and roll into a ball. Wrap in plastic wrap and refrigerate for 30 minutes.
Cut the dough in half. Roll each piece on a well-floured board into a circle, rolling from the center to the edge, turning and flouring the dough to make sure it doesn't stick to the board. Fold the dough in half, place in a pie pan, and unfold to fit the pan (this is so you can transfer the dough without ripping it). Wrap the remaining dough in plastic wrap and shape into a disk. Refrigerate or freeze for future use.
Heat the oven to 375 degrees. Crimp the edges of the pie dough to create a nice crust. Line the pie crust with foil and ad pie weights (or dried beans or rice) to weight it down. Bake for 20 minutes. Remove foil and weight and bake an additional 10 minutes, or until crust is golden brown. Cover edge with a pie shield if it starts to brown. Remove pie crust from oven and set aside to cool.
FOR THE FILLING: Layer banana slices evenly in the bottom of the crust. In a medium saucepan, combine the sugar, milk, cornstarch, eggs, and salt. Whisk until smooth. Cook over medium heat, stirring constantly, until it begins to simmer and thicken.
Remove from heat and add the butter and vanilla. Stir until melted. Pour the filling into the baked crust. Place a layer of plastic wrap over the crust, and press down so it touches the surface of the filling. Chill overnight.
Beat the cream on high in an electric mixer fitted with the paddle attachment. After one minute, add the powdered sugar and continue beating until the cream holds soft to medium soft peaks. Taste for sweetness and add more sugar if desired. Top the pie with the cream and refrigerate until ready to eat.
Toasted sliced almonds would be a nice touch on top. Just sayin'.
Thursday, October 20, 2011
Copycat Olive Garden Salad and Bread Sticks
My friend Melissa absolutely loves The Olivia Garden. I used to make fun of her because she would plan her trips to Denver around the restaurant. Her birthday? She wanted to go to The Olive Garden. Anniversary? Olive Garden. Driving to Arizona? We have to time it so we can have dinner in Grand Junction at The Olive Garden. Not that anything is wrong with this obsession, it's just that for a while I didn't quite understand. It's a chain for crying out loud. I shouldn't be surprised. Her husband's ultimate favorite restaurant? Chili's. Did you know I used to work at a Chili's? "Hello, thank you for calling Chili's, great food to go, this is Krysta how can I help you?" Oh, am I off topic again? That happens to me sometimes. My friends used to yell "Hey, look a chicken!" when I did that. Anyway, I think you can understand. I'm a foodie. I can appreciate a chain, sure, but I'm not scheduling my life around it. Then I went there.
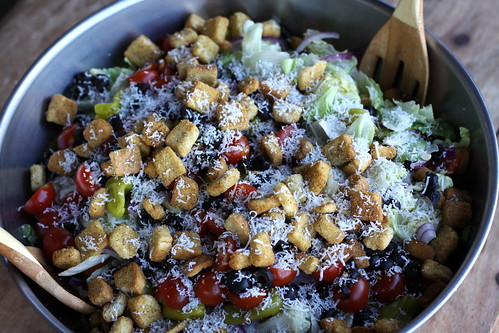
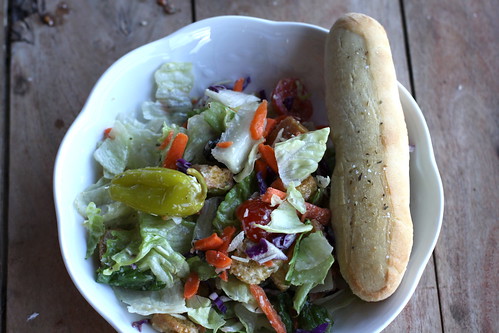
It's not like I haven't been to The Olive Garden before. I have, and it was good. But it had been quite a long time. This time, I left with a new perspective of this chain restaurant I had deemed not good enough. That salad and bread sticks were...damn, Gina. They were GOOD. Really, really, good. I now try to hit the Olive Garden up when passing through Grand Junction. I now make copycat recipes in my own kitchen when I can't go to the actual restaurant for the salad and bread sticks. Soft, garlicky, mildly herby, hot from the oven bread sticks which are so easy since they only require one quick rise. Easy enough to make after a days work, as well. And salad that is so crisp and tastes exactly like the real thing. Really, I wouldn't lie to you. The dressing is pretty spot on. Thanks to Food Network magazine for coming up with this winner. The salad isn't the only thing I feel in love with at the OG. I also happen to have a copycat recipe for their delicious minestrone soup as well. Oh, friends. You. Are. Welcome.
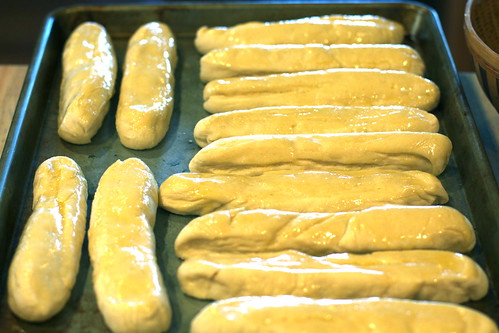
after the rise, before baking. Sorry about the totally sucky lighting
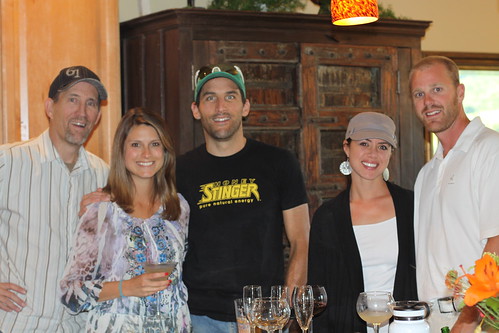
The happy campers who got to partake in the Olive Garden Feast. Father-in-law, Jeremy and me, Shawn and Melissa
If you make this salad for the main course, I suggest you double (or tripple) the recipe so it can be "unlimited" just like Olive Garden.
Olive Garden Salad and Breadsticks
adapted from Food Network Magazine, Copy That! Column
Garden Salad: serves 4
FOR THE DRESSING:
1/4 cup extra-virgin olive oil
2 tablespoons white wine vinegar
3 tablespoons miracle whip
1 tablespoon lemon juice
2 tablespoons grated Parmesan cheese
1/4 teaspoon garlic salt
1/2 teaspoon dried Italian seasoning
1-2 tablespoons water
FOR THE SALAD
1 10-ounce bag American salad blend
1/4 red onion, thinly sliced
4 small pickled peppers, such as pepperoncini
1 small vine-ripened tomato, quartered
2 tablespoons sliced black olives
1/2 cup large croutons
1 tablespoon grated Parmesan cheese
Combine all the dressing ingredients and 1 to 2 tablespoons water in a blender or food processor; puree until smooth. Place the salad blend in a large bowl and top with the remaining salad ingredients. Drizzle with the dressing and toss.
Olive Garden Bread sticks
makes 12-16 bread sticks
FOR THE DOUGH
1 package active dry yeast
4 1/4 cups all-purpose flour, plus more for dusting
2 tablespoons unsalted butter, softened
2 tablespoons sugar
1 tablespoon fine salt
FOR THE TOPPING
3 tablespoons unsalted butter, melted
1/2 teaspoon kosher salt
1/4 teaspoon garlic powder
Pinch of dried oregano
Make the dough: Place 1/4 cup warm water in the bowl of a mixer; sprinkle in the yeast and set aside until foamy, about 5 minutes. Add the flour, butter, sugar, fine salt and 1 1/4 cups plus 2 tablespoons warm water; mix with the paddle attachment until a slightly sticky dough forms, 5 minutes.
Knead the dough by hand on a floured surface until very smooth and soft, 3 minutes. Roll into a 2-foot-long log (measure). Cut into 16, 1 1/2-inch-long pieces. Knead each piece slightly and shape into a 7-inch-long bread stick; arrange 2 inches apart on a parchment-lined baking sheet. Cover with a cloth; let rise in a warm spot until almost doubled, about 45 minutes. I set my oven temperature to 250 degrees and let it warm up for 1-2 minutes before I shut it off so that my bread sticks have a warm place to rise. The warmer the environment (but not hot) the quicker it will rise)
Preheat the oven to 400 degrees and make the topping: Brush the bread sticks with 1 1/2 tablespoons of the butter and sprinkle with 1/4 teaspoon kosher salt. Bake until lightly golden, about 15 minutes. Mine were done after 12 minutes. Check them and make sure they don't brown or turn golden. Meanwhile, combine the remaining 1/4 teaspoon of salt with the garlic powder and oregano. Brush the warm bread sticks with the remaining 1 1/2 tablespoons melted butter and sprinkle with the flavored salt.
Wednesday, October 19, 2011
Oh How Pinteresting- Food Edition
Like most of you, I have become completely obsessed with Pinterest. If you don't know what it is you really need to. Pinterest is a visual organized folder. Anytime you see something on the Internet that you want to remember, or print off, or make a mental note about, just pin the picture (it's easy once you sign up) and put it in whatever folder is appropriate.
The food below comes from my Food folder on Pinterest. Follow me if ya want (the button is in the corner). I'm always pinning food things (as well as everything else under the sun) This is what I'm most excited about this week:
Muffin Pan Tacos - I'm going to attempt to do these with Ezekiel tortillas and a black bean filling. If it's a success, I'll be blogging about it!
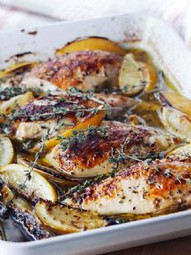
Baked Lemon Chicken- If I ate chicken this is what I'd be making this week!
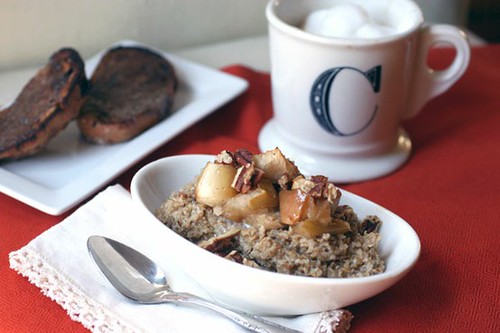
Roasted Cinnamon Apple Oatmeal- Yes, please!
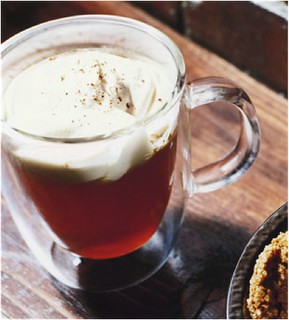
Spiced Apple Cider with Rum Whipped Cream- Definite. Make.
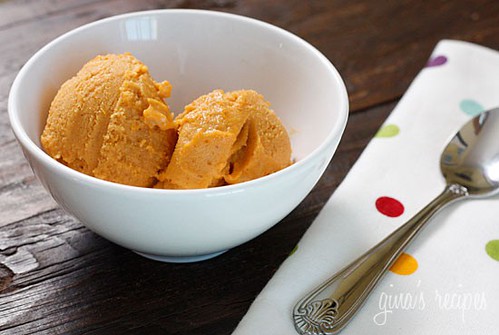
Pumpkin Sherbet- I (heart) this one.
Happy Wednesday everybody!
Subscribe to:
Posts (Atom)
about cooking


CInnamon Apple Oatmeal">