Wednesday, September 26, 2012
Skinny Baked Potato Soup
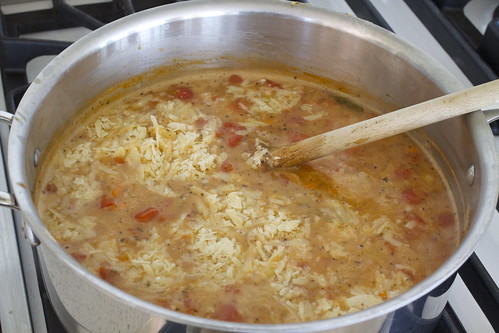
Technically you're supposed to start with baked potatoes in order to call something a baked potato soup but I realize that not everybody has spare baked potatoes lying around, you know? I prefer to call this a baked potato soup because it's a potato soup which contains sour cream and gets topped with baked potato toppings like salty bacon, melty cheese and green chives.
Not using baked potatoes also cuts down on time since you can boil the cauliflower and potatoes together making this a quick weeknight meal. But by all means, if you have baked potatoes and want to use them, just add them in at the end after the cauliflower has cooked.
I made this "skinny" by using cauliflower in place of half the potatoes called for. Cauliflower brings more to the table than saving you a couple hundred calories though. It boosts the protein and fiber of the soup which makes you feel more satisfied when you get done. It also keeps you healthy with vitamin C, vitamin K, folate, potassium and manganese. Yay, vegetables! And you can't taste it at all! I love cauliflower, but we are making baked potato soup soup here, so it might be a little strange if you could totally tell. You can't. It's perfect.
I did decide to add some cream, which is not figure friendly, but you need something to richen this up and a measly 1/4 cup total only adds about 45 calories to your serving. If you don't like this, use milk instead, just add more. Non-fat Greek yogurt is the main source used to cream it up and add the essential tang to the soup. It's a much better choice than traditional sour cream and brings other nice benefits like probiotics to the table.
Skinny Baked Potato Soup
serves 4-5
3 tablespoons olive oil
1 yellow onion, chopped
1 medium sized head cauliflower, chopped
2 Russet potatoes, medium diced
2 cups chicken broth
4 1/2 cups water
1 teaspoon garlic powder
1 1/2 teaspoons sea salt
1/4 teaspoon black pepper
1/4 cup cream or 1/2 cup milk
3/4 cup plain non-fat Greek yogurt (or sour cream)
Toppings: bacon crumbles, cheddar cheese, chives
Heat the olive oil in a large pot over medium heat. Add the onion and saute until translucent, about 7 minutes. Add diced potatoes, cauliflower, chicken broth, water, garlic powder, salt and pepper and bring to a boil. Turn the heat down and simmer until the potatoes and cauliflower are just tender, about 25 minutes.
Coarsely puree the soup with an immersion blender. I like it mostly smooth with a few lumps for texture. Turn the heat off and add cream and Greek yogurt. Stir to incorporate. Top with toppings of your choice.
Monday, September 24, 2012
Homemade Pumpkin Spice Latte + Pumpkin Bread
This is the official first week of Fall, and, I bet a few of you will be celebrating with a Starbucks Pumpkin Spice Latte, yes? Last year, I decided to make a few of these at home. Join me this year?
For the recipe, click here.
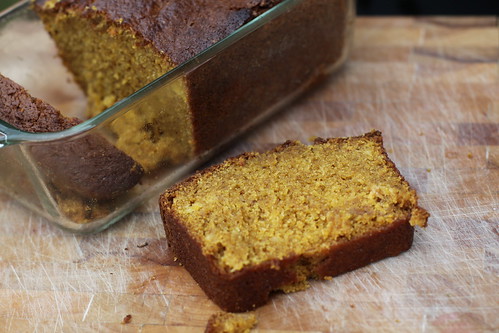
Latte's not your thing? How about some Pumpkin Bread? I wrote this post when I was still new at blogging and -I'm forewarning you- I ramble on and on about blogging and the politics of it. I can't verify how much of it is true. I still have no idea how this blog thing works.
I've got a very, very busy week ahead of me starting in T-minus 35 minutes. New recipe coming Wednesday!
Thursday, September 20, 2012
Perfect Hot Fudge Sauce
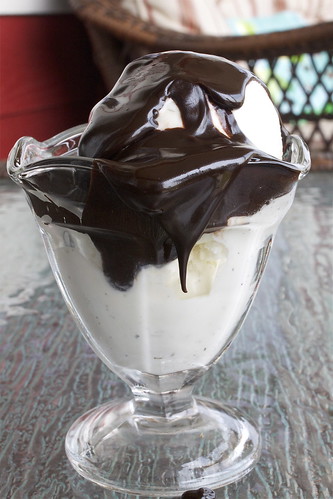
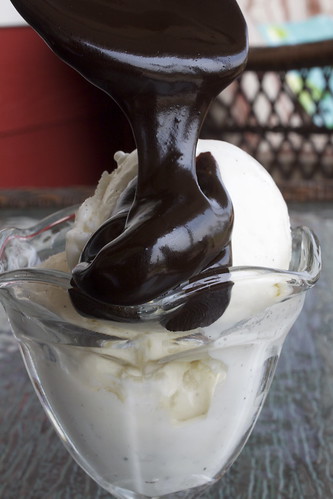
Do you see how this sauce drapes and pools in thick, rich puddles all over the ice cream? Ohmygoshiamnotkidding- this is a must make/pin/save/print/bookmark, whatever you do, make note to make this hot fudge and only this hot fudge when the occasion calls for it. Let's examine why, shall we?
Besides the sheer beauty, this recipe strikes a perfect balance in flavor and uses both cocoa powder and real chocolate for its base. It calls for corn syrup as well, which you might mistake for being a bad thing, but it's what makes it sticky and gooey which is definitely what you want in a hot fudge sauce. Besides, let's not feign concern for our health while setting out to make hot fudge sauce. It's in poor taste. Add in some brown sugar for cozy sweetness, lots of butter, a splash of vanilla, and you have one sophisticated sauce. I would love a big bowl of vanilla ice cream with this sauce draped over with just a sprinkling of sea salt. It's so decadent and rich and the best part? Easy! One pot wonder, y'all.
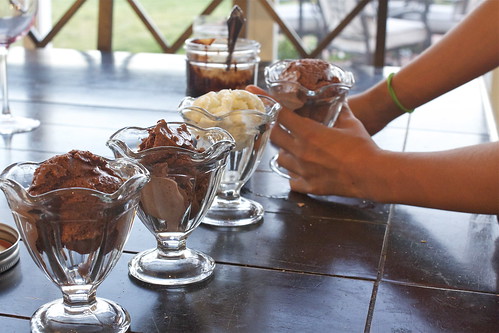
I love serving ice cream sundaes as dessert to adults. It's whimsical and fun and very familiar. Add some roasted almonds and your table will go wild.
I am catering a retreat next week and I'll be serving an ice cream sundae bar. I've got my fridge full of sauces in mason jars including a salty, buttery caramel sauce and a marshmallow sauce that are both to die for. Recipes to come. I promise. I'll roast some assorted nuts, put out sprinkles, whipped cream and cherries. I think it's going to go over quite well.
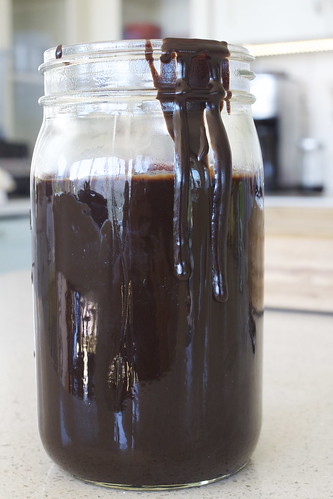
This sauce will keep in a sealed container in your fridge for 3 weeks. When you fancy yourself a sundae, just plunge your cold jar into a saucepan of hot water for a few minutes until it re-heats and is pourable.
Perfect Hot Fudge Sauce
adapted from My Baking Addiction
yield: about 2 cups
2/3 cup heavy cream
1/2 cup light corn syrup
1/3 cup packed dark brown sugar
1/4 cup cocoa powder
1/4 teaspoon salt
6 oz. quality bittersweet chocolate, finely chopped (I used Ghiradelli)
2 tablespoons unsalted butter
1 teaspoon pure vanilla extract
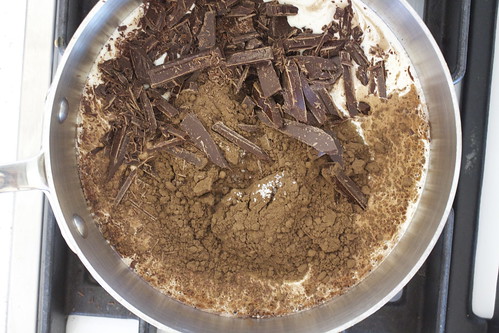
in a medium, heavy saucepan over medium heat, combine cream, corn syrup, brown sugar, cocoa, salt, and half of the chocoalte. Bring the mixture to a boil stirring until the chocolate pieces are completely melted.
Reduce heat and cook at a low boil, stirring occasionally, for a about five minutes. Remove the pan from the heat and add in the butter, vanilla, and remaining chocolate and stirring until smooth. Allow the sauce to cool down before serving.
Tuesday, September 18, 2012
Pina Colada Smoothie
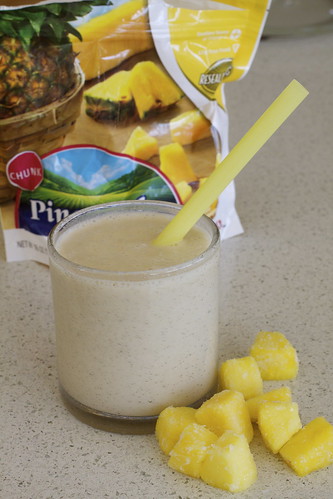
In the mornings, our breakfast smoothies pack a hefty nutritional punch. We make ours with bright berries, a mix of seasonal fresh and organic frozen fruit, water, chia seeds and/or a scoop of vegan complete powder that has vitamins, minerals, protein, antioxidants and the like. Sometimes though, you just want a tasty little tropical snack. That's where this pina colada smoothie comes in. Not that it isn't good for you. It is. It's just not a crazy nutritional powerhouse. If you tend to run low on calcium, like I do, this smoothie is a perfect choice since coconut milk is especially high in it.
Make sure you buy plain coconut milk, as vanilla will not be as good at achieving that really pure coconutty richness.
Would I be a total lush for suggesting that rum would taste excellent in this? If I am, then I apologize because RUM WOULD TASTE EXCELLENT IN THIS! I'll definitely be making this the next time I make real pina colada cocktails instead of that sickly sweet Coco-Lopez cream of coconut. I'd much rather get my sugar from bananas, pineapple and coconut milk than that nasty stuff.
I love this just as is, but if you'd like more coconut flavor you could always add in a few drops of coconut extract.
Pina Colada Smoothie
makes 1
1 small banana, frozen
1/2 cup frozen pineapple chunks
1 1/4 cups coconut milk (from a carton, not a can. I used Silk pure coconut, original)
Blend everything into submission and enjoy.
In other news, I found this video on my computer today. Isabella? What. Thee. Heck?
Friday, September 14, 2012
Cold Brew Coffee + A Yoga Latte Mom
A "yoga-latte" mom is someone who wears Lulu Lemon (or equivalent of) workout gear and does -in fact- workout. She gets a vegetarian lunch at her local health food store, drinks green juices and Starbucks, likes to get together with her friends, is involved in some sort of charity or PTA work, likes jewelry, a good cocktail, great cheese, and keeps her fingers manicured. She takes very good care of her family. She does yoga or Barre or zumba, walks or jogs, and is not afraid of a little hard work.
This is the real definition according to my friend Danielle, who made up the term.
Me and Danielle
Danielle will sometimes say things like "I just kind of want to be a yoga-latte mom and help out at the kids schools, do a bible study, workout and lunch and be home"
I just want to smack her sometimes because it's not, like, something we have to aspire to be. The fact is, we ARE yoga-latte moms. By nature we lunch, drink wine and take classes at the gym, hike, and volunteer our time to whatever is needed, whether it be dinner for Young Life or a sick friend, or loving people and maintaining important relationships. We work on ourselves, care about our health, aspire to make a difference, read books, become better people by allowing ourselves to grow. We also wear Lulu, love cheese and cocktails (hello?!), drink green vegetable juice and Starbucks, so I mean, how much more convincing do you need?
This my friends, is a very yoga-latte mom thing to make. Why? Well, you already heard about the Starbucks, but this goes beyond that. Cold pressing coffee is said to reduce the amount of caffeine in each cup and reduces the acidity. Plus this method yields a rich, non-bitter and smooth cup each time. It's ideal for those trying to become less acidic and more alkaline but will not give up their morning cup a joe. Without so much bitterness, you can really pick up the delicate flavor notes in the coffee like vanilla or chocolate. And since a yoga-latte mom is always trying to improve her health without having to sacrifice too, too many indulgences, this is a perfect fit.
I love coffee, but I don't like the caffeine or the bitterness. This cold pressing? It tastes like French press coffee, and have you ever had that stuff? Good gracious man, it's from the heavens. People who think they don't like black coffee will probably change their minds right quick after trying this. Although, I can't deny it would be decadent to have a hot steamy mug with a tiny splash of cream. This method is excellent for iced coffee, by the way since it yields such a clear, smooth flavor.
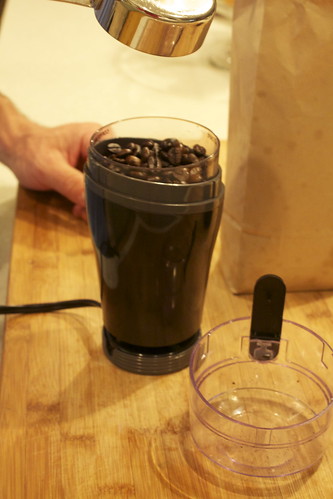
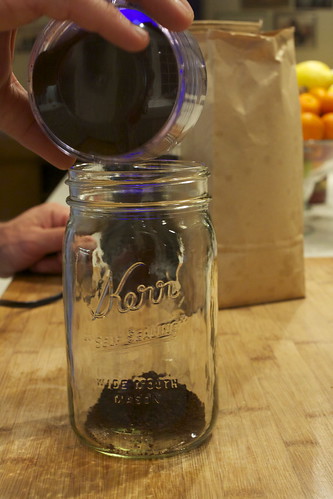
step 1, grind your beans
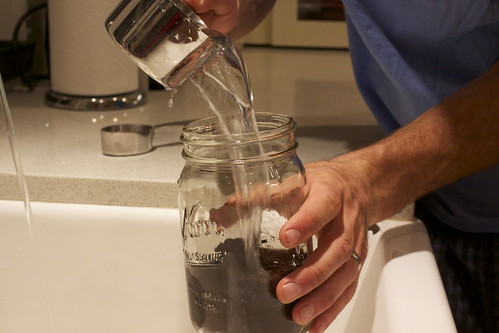
It's easy, easy, easy too. All you need is a coffee grinder and a mason jar or another sealed container. You combine the coffee grounds with cool water and seal. Let it sit together overnight (12-36 hours) strain, and you end up with a concentrate. The longer you let it sit, the better your coffee will be. When you want a cup, you combine a bit with boiling water and voila! Instant real coffee. I'm actually debating throwing out my coffee maker.
step 2, put the grinds in a mason jar
step 3, add cool water
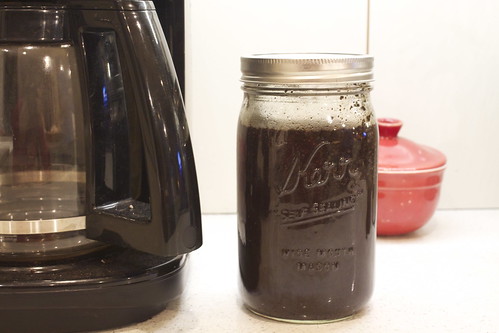
step 4, seal and let it sit for 10-24 hours. 15-18 hours recommended
step 5, the next day, strain your coffee through your coffee filter or a French Press into a clean jar (not shown)
step 6, add 1/2 coffee concentrate to your cup and 1/2 boiling water. Enjoy!
I drink this happily. This and my tofu salads and coconut water from the local health food store, because, hey, I am what I am.
But for the record? I am waaaaaay more than my stereotype.
Cold Brew Coffee
adapted from the nourishing gourmet
yields 4-8 cups of coffee
1 1/3 cup freshly ground coffee (organic highly recommended since coffee is a highly sprayed crop)
4 cups filtered water
Combine coffee and water in a mason jar or French press. Stir to combine well. Cover and leave for at least 12 hours and up to 36 hours at room temperature. We left ours for 17 hours (we made it in the afternoon for the next day) and it was excellent.
Put a coffee filter in a fine sieve over a small mixing bowl or 4 cup measuring cup. Slowly pour coffee through the filter. This is your concentrate.
Keep refrigerated. To serve, dilute to your preference. We like ours at a one-to-one ratio ( 1/2 concentrate, 1/2 boiling water). A one-to-three ratio is also common, (1/3 concentrate and 2/3 boiling water) but too weak for my preferences. I suggest trying this first and then adding more water if needed.
This will keep for 1 week in the refrigerator and yields about 8 cups of coffee depending on your ratio preferences. You can easily double this recipe.
I'm off today for a nice weekend getaway in Bachelor Gulch/Vail where I can unwind, eat fabulous food and love on my husband. Get yo minds out-a da gutta. Danielle, do yoga-latte moms like to talk ghetto every now and again? My flavor sure does.
Monday, September 10, 2012
Tomato Basil Parmesan Soup - Lightened Up
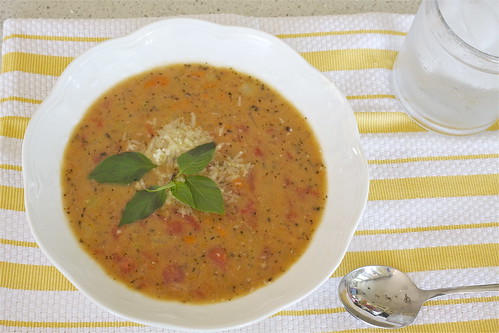
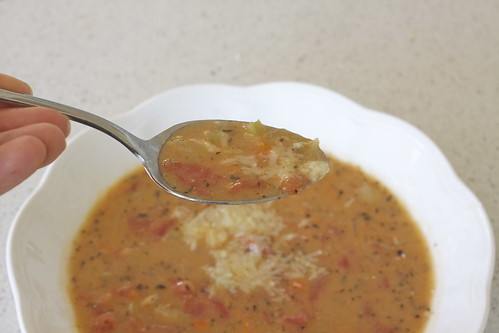
I am all for "healthifying" food as long as it tastes as good as the original. This is precisely the case here. This is not a "healthy meal" by any means, but it does have healthy components, and by cutting almost half the bad fats out of this sucker and still having it taste great means I can serve it and call it dinner. Yay! With a salad its a very balanced meal. You could easily add and extra carrot and/or celery stalk to this recipe to boost the vegetable factor too, if it tickles your fancy.
So what did I change?
I cut out 5 tablespoons of butter and replaced it with olive oil. I left a bit of butter in since I didn't want to sacrifice that flavor. I cut the Parmesan cheese by 1/4 cup, and half and half by 1 1/2 cups! Seriously. Then, I replaced a 1/4 cup of the flour with healthier whole wheat. But, it doesn't taste like it's missing anything but your spoon.
Tomato, Basil Parmesan Soup - Lightened Up
adapted from Randomthoughtsandthrills
serves 4
3 tablespoons butter
5 tablespoons olive oil
1 cup carrots, diced small
1 cup celery, diced small
1 cup yellow onion, diced small
1 28-oz can diced tomatoes (or 2-15oz cans)
4 cups vegetable stock - or chicken stock
1/2 cup water
1 tablespoon dried basil
1 bay leaf
1 teaspoon sea salt
1/2 teaspoon black pepper
1/2 cup all purpose flour (I used 1/4 cup whole wheat flour and 1/4 cup all purpose)
1/2 cup half and half (or you could use 1/4 cup cream)
3/4 cup Parmesan cheese, freshly grated (the pre-grated stuff won't melt into your soup)
Chop all your veggies, and grate the cheese so you will be all prepped for making the soup.
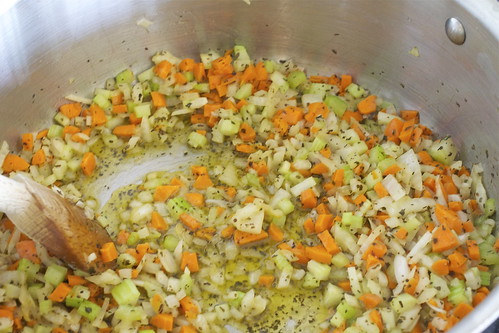
In a large pot over medium heat, melt the butter and olive oil together. Add the carrots, celery and onion and saute until soft, about 7 minutes. Add the basil, salt, pepper, and flour and stir for 1 minute. Add vegetable stock, 1/2 cup water, bay leaf and the can of tomatoes with their juices. Turn the heat up and bring to to a boil. Lower heat and simmer for 15 minutes. Stir in half and half and Parmesan cheese and stir to melt. Taste for salt and add more if necessary.
I am currently wrapping up a three day juice fast so I haven't been in the kitchen much lately. For the record? Juice fasts? CAKE compared to a water fast, which I've also done. I could go longer but I just did it for a little reboot/clean-up, plus, I'm not gonna lie, just because I can do a juice fast with relative ease doesn't mean I don't miss food. I am eagerly awaiting dinner tonight!
Thursday, September 6, 2012
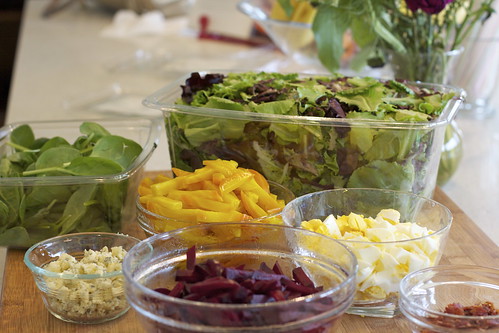
Spinach, Beet, Bacon, Egg, and Blue Cheese Salad
This recipes name doesn't have you at hello, does it? It doesn't quite lure you in with that boring title. Don't let that fool you. You ought never to judge something by what it seems. Isn't that what were taught? Don't judge a book by it's cover. For a non-food example- when you see my daughter roaming the halls at school in her new DC skater shoes and flat hat, you might be apt to think
Oh, there goes that beautiful girl who hasn't blossomed into a lady with fashion sense quite yet
Or, most likely,
She looks like a punk.
She wants you to think the latter. She thinks it's cool.
We took the two oldest kids to Denver before school started to celebrate the end of summer. We went to the zoo and to the movies. We ordered room service dessert, and we went to the mall to get my daughter some shoes...more specifically, to get her a pair of TOMS. But once we got there, somehow the plan changed. Wouldn't these DC shoes be better? I love these DC shoes! Can I get the cool shoes? Mom! Toms are dork shoes! They look like you.
What?! How are these dork shoes?! They are pretty shoes.
I made her try on a pair of the TOMS. She stomped around the store barely giving them a second glance before she ripped it off and put the DC's back on. In a last ditch effort, I showed her the converse rack- wouldn't these be nice?
Not a chance. She was set on the DC's. So, she got them. And now she now walks around looking like she has boats on her feet. Sigh.
Jeremy had to have a talk with her that went something like "a person is a punk because of how they behave, not what shoes they wear...and I know my little daughter is NOT a punk. That's why I'm letting you get these." He's biased though because he used to wear punk shoes which he was not allowed to straight lace. I used to wear Adidas and Converse. Isabella and I were not going to see eye to eye on this. She has a very strong fashion sense, that child, and I need to let her be her because I would literally die if someone took away my nude patented leather ballet flats and made me wear some neon high tops.
At least theres a cute pop of blue
I let her be her, but I hightailed it out of that store right quick when my son brought me these with inquisitive eyes.
He's 5. He can be who I want him to be a little longer. I joke. I actually thought those were very cute, albeit funny, on him.
Anyway, all that to say you can't judge until you know, whether it's shoes on a person or salads with lame names. You just can't know. My daughter is a gem, and this salad is simply off the hook.
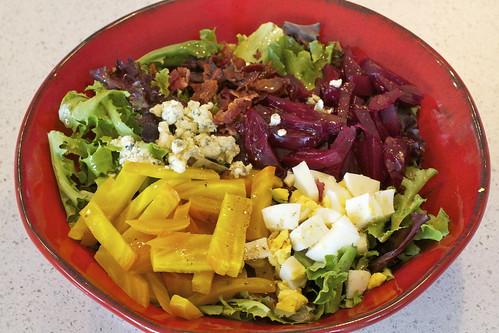
My Grandpa Grillo made this for us one night after my Grandma prepared some fresh beets. I remember it distinctly because I had never been so enamored with a salad. I had never found myself going back for second and third servings of salad ever before that. I had also never had a salad as my main meal before and been satisfied. This one though? With the long and uninteresting name? It was perfect. Everything about it. I can still see my grandpa, sitting there in his chair, hovered over his giant silver metal bowl, clanking his fork around eating hearty mouthfuls of salad. He is notorious for his salad making skills. And, eating a big salad in an oversized bowl has become mandatory at our house. You need plenty of room for tossing you know. The one I used for the picture above is too small.
We can't consider this the healthiest of salads with the hard boiled eggs, blue cheese, and bacon. But, when you consider how many greens and beets you are eating and really, really enjoying, it sort of evens itself out. The trick is in your proportions. I make sure to pile on the greens and beets while the rest is used scantily for flavor enhancement. It's a good deal. With all the fiber, protein and fats going on you'll definitely feel satisfied with this as a main meal.
You can dress this with the warm bacon vinaigrette below, or just use your favorite blue cheese dressing. I think my Grandpa made an Italian dressing from scratch with hefty chunks of blue cheese in it. It's pretty amazing.
Spinach, Beet, Bacon, Egg, and Blue Cheese Salad
serves 4
For the salad:
12 cups fresh spinach (about 3 cups a person)
8 fresh beets, roasted and chopped (red or a mix of red and golden)
8 strips of bacon
Blue cheese, crumbled
4 hard boiled eggs, chopped
Toasted walnuts or sunflower seeds for crunch (optional)
Kosher salt
For the dressing:
3-4 tablespoons bacon grease (leftover from frying the bacon)
4 tablespoons olive oil
3 tablespoons red wine vinegar
11/2 teaspoons Dijon mustard
1 teaspoon sugar
Kosher salt
Freshly Ground black pepper
Roast the beets, peel, and chop into thin strips. Place in a bowl and cover until ready to use.
Fry the bacon over medium heat in a heavy bottomed skillet until crispy on both sides and save the drippings for the dressing (8 strips of bacon should yield about 4 tablespoons of fat, which you'll need for the dressing). Drain cooked bacon on paper towels, and when cool enough to handle, crumble into a bowl. Cover until ready to use.
Boil your eggs. Try this perfect method.
To make the dressing: To the skillet of bacon drippings, add the vinegar, olive oil, Dijon mustard, sugar, a generous pinch of salt and black pepper. Whisk to combine. Dressing will separate as it sits, so whisk again just before serving.
Place a bowl of spinach out on the table surrounded by bowls with all the toppings (beets, eggs, blue cheese crumbles, toasted walnut pieces, crumbled bacon). Let each person add their desired amount of toppings salad bar style. Drizzle with dressing. Sprinkle with salt. Add a splash or more of red wine vinegar to your bowl for extra zip if desired.
I loathe chewing fresh spinach (tastes great but makes my teeth gritty) so I used baby field greens for my lettuce. Spinach would be classic though.
Tuesday, September 4, 2012
How To Roast a Beet
When the beets get big and juicy I'm helpless to resist them. I'll sit in the grocery store or farmers market aisle imagining all the ways I could use them. Make a big ruby-hued pot of vinegary Borscht? Saute them into a sweet potato hash? More times than not I opt to simply roast them and make big, beautiful beet salads. I use a fool proof method for roasting and peeling beets thanks to Mr. Thomas Keller. Try it and after you see how easy it is, maybe you'll find yourself in the grocery store pondering all the ways you could use a beet. You'll never used canned again. Your eyes will be opened. You'll know too much to go back.
Preheat your oven to 375 degrees
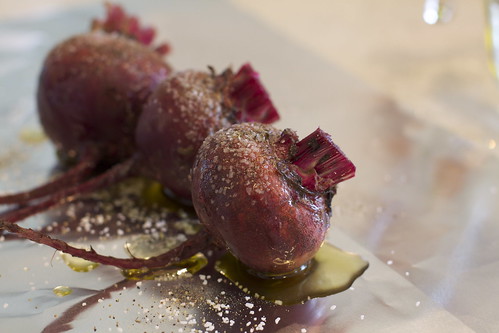
Step one- trim the leaves using kitchen shears. Cut the tops off leaving about an inch attached.
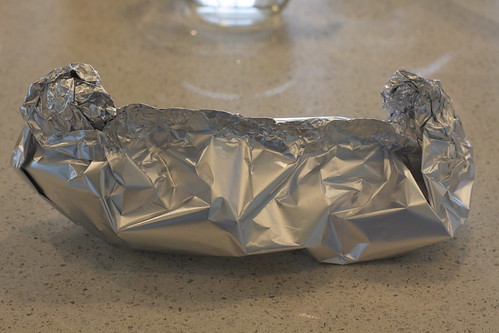
Step two- place beets two or three at a time in a row on a long piece of aluminum foil (heavy duty works best). For each aluminum foil package, drizzle to cover tops of beets with a few glugs of olive oil (about 2 tablespoons) and sprinkle generously with salt and pepper. Fold sides of aluminum foil up so the liquid won't leak out and add 2 tablespoons water.
Step three- quickly (before any water leaks out) pinch pieces of aluminum foil together to from a packet. Make sure everything is sealed tightly.
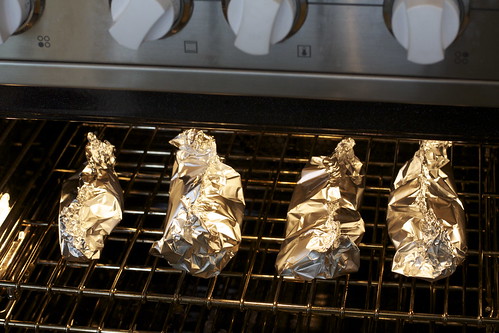
Step four- place packet into the oven and roast for 1 1/2 hours or until beets are fork tender. Unless you have crazy large beets, they will be done.
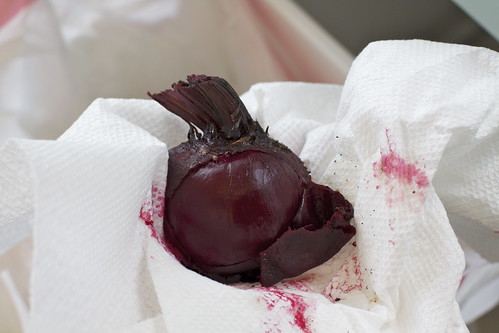
Step five- let beets sit until cool enough to handle, about 20 minutes. Rub each beet between paper towels until the skin slips off. Use more paper towels as needed.
You may need to cut the tops off the beets if they don't rub off on their own.
Now you are ready to slice, chop, or julienne your heart out.
How will you use a beet?